
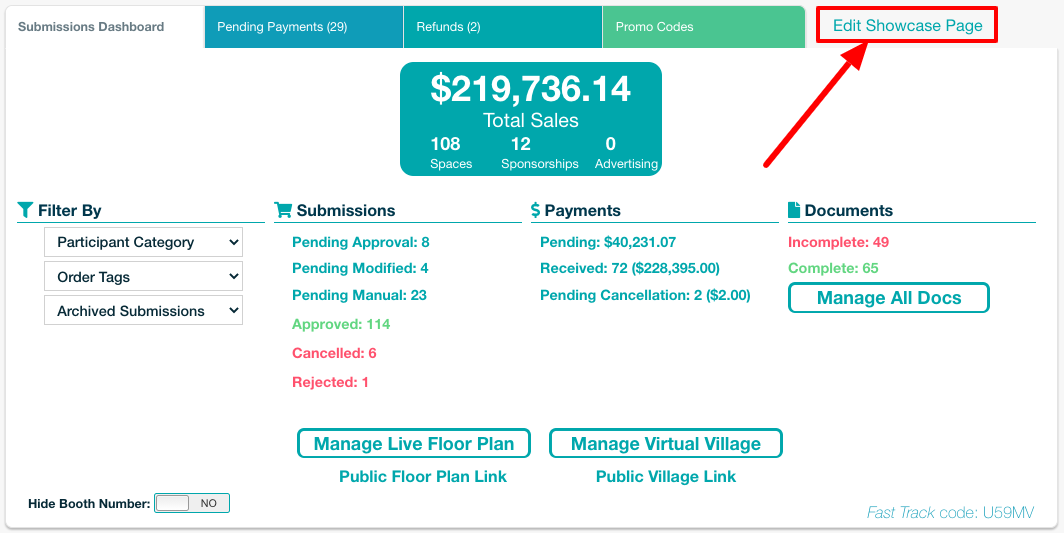
If all of the orders submitted for your event are going to include access to the virtual event with a virtual booth, you will want to turn on the setting to Enable Virtual Booths By Default For All Exhibitors. To access this, click on the Edit Showcase Page link from the Events Dashboard or the Submissions Dashboard.
From Events Dashboard

From Submissions Dashboard
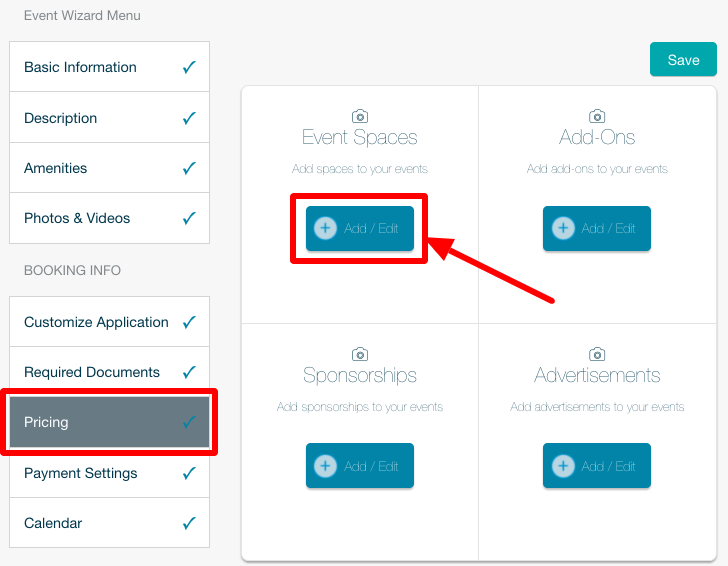
Then select Pricing on the left, and click the + Add/Edit button under Event Spaces.
By toggling Enable Virtual Booths By Default For All Exhibitors to YES, once you approve an order, an exhibitor will immediately be given access to their virtual booth.
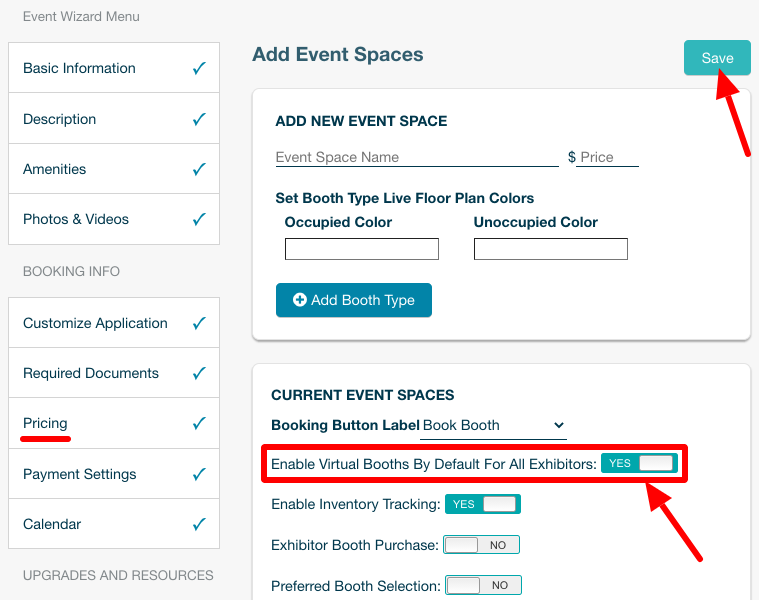
For events that are having a hybrid event, you can keep this toggle set to NO, and if the exhibitor purchased a virtual booth, you can enable their virtual profile via the Submissions Dashboard.
If you are activating virtual booths one by one, you have to Activate Virtual Booth after you approve the exhibitor's order. Back on the Submissions Dashboard, find the order that you've already approved, check the box to select the order, and then select Activate Virtual Booth via the actions dropdown in the upper righthand corner. You can deactivate access using this dropdown as well.
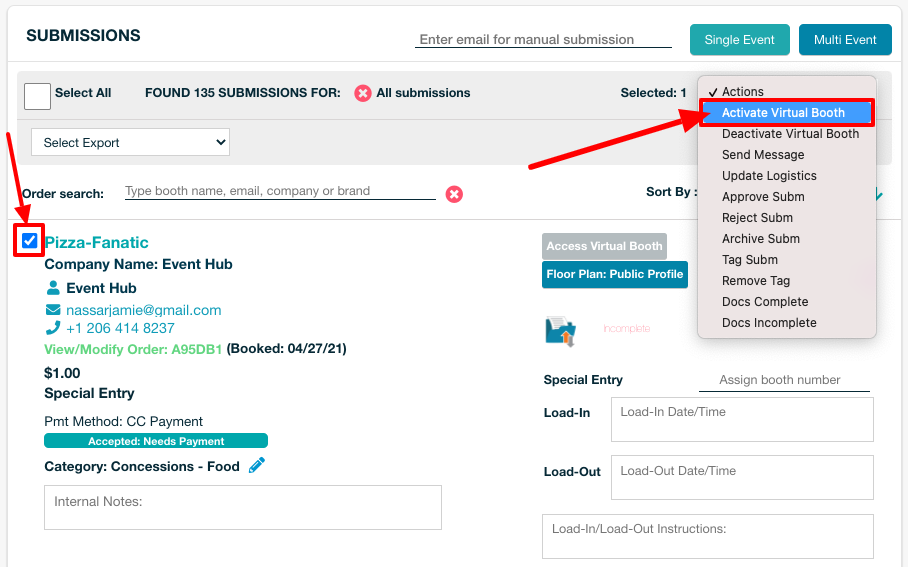
You can also select all orders in your view on the Submissions Dashboard and activate the virtual profile for more than one booth at a time. See it in action in this short video!
If the exhibitor cancels their order, your next step is to accept the cancellation and once that is done, this will deactivate access to the virtual village.
Comments
0 comments
Please sign in to leave a comment.