
This guide has been taken from OneStream [original link here]
OneStream is a third party provider, we do not offer technical support on their product. Please reach out to their team with questions, and check out their page to determine what subscription is best for your purposes, etc.
~~
Live streaming becomes extremely easy and fun when you use OneStream. Setting up live streaming is not easy even for a tech savvy person. Most non technical persons will just give up after 15 20 min. When it comes to pre recorded videos there is hardly any cloud based solution available other than OneStream. Before OneStream you had to install a software e.g OBS or Wirecast. Set it up, configure some technical details like bit rates, frame rates, video formats etc and then hope that it works. OneStream makes live streaming so simple that anyone can stream their videos live in less than 5 min. It takes away all the pain and cumbersome tasks of setting up streams and lets you focus on your customers.
Let us explain in a simple step by step tutorial, how you can live stream your prerecorded videos with OneStream.
NOTE
- If you want to receive the shareable Youtube video link before going live, turn on the "System Message" in Advanced Settings.
- Click the "copy link" icon to copy the link to your clipboard.
- Make sure livestreaming is enabled for your YouTube account, at least 48 hours before you're trying to go live. Fore more information, please refer to this article from Google.
- You need a monetized YouTube account in order to have your livestream embedded on a third-party site. This is required for it to be able to play on the EventHub page.
- For more information, please refer to this help article on How to Enable Live Streaming on YouTube.
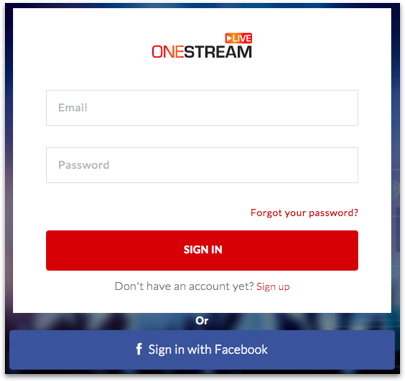
1. Create your account on OneStream
Click Sign In on the top right

2. Log in to you account (or sign up for a new account)
Sign In via your Facebook account or using your email.
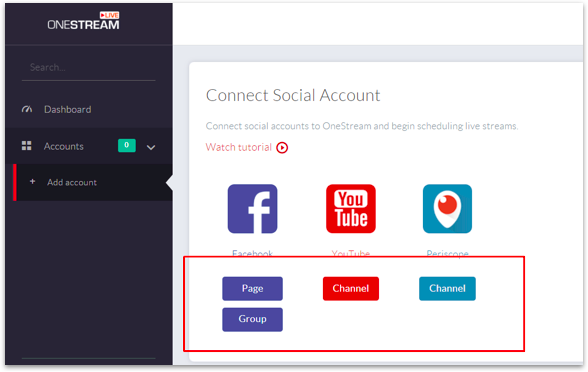
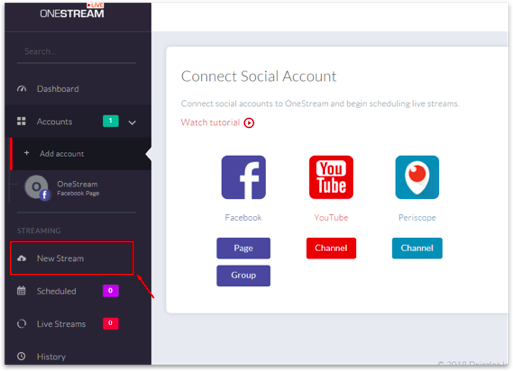
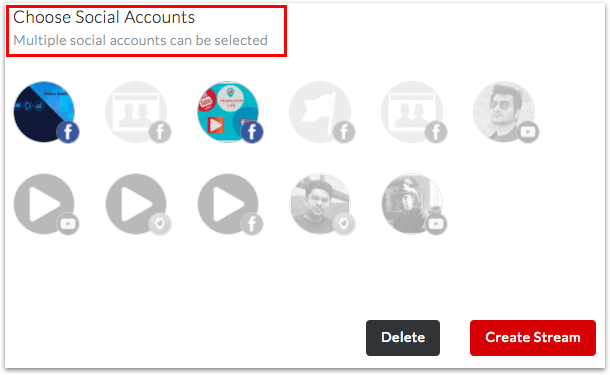
3. Add Social Account
Click Page or Group if you want to add Facebook Page or Group or click Channel in case of YouTube or Periscope.
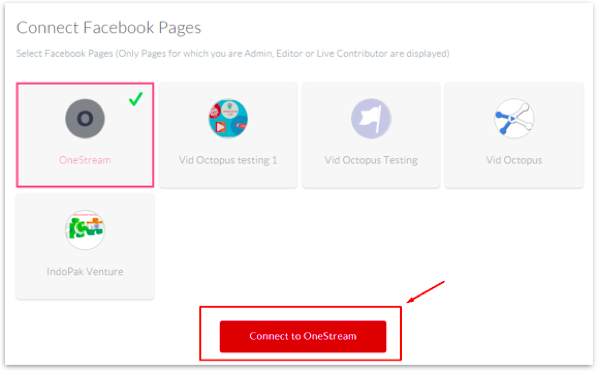
In this example we will add a Facebook page. Click the Page button to display all your Facebook pages on which you have admin rights. Select the page you want to add and click Connect to OneStream.
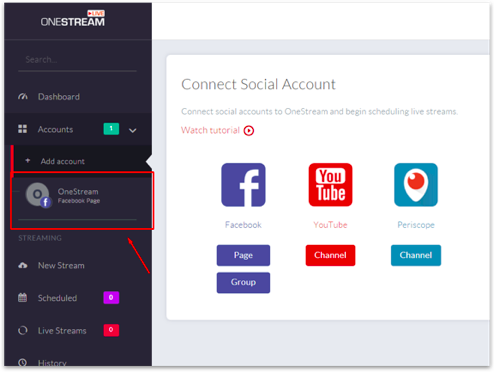
The page will now appear under Add Accounts on the left hand Sidebar.
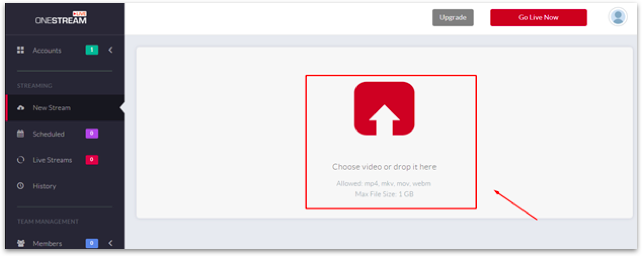
4. Upload Video
Click New Stream on the Sidebar.
Upload your video by clicking or dragging and dropping in the white frame.
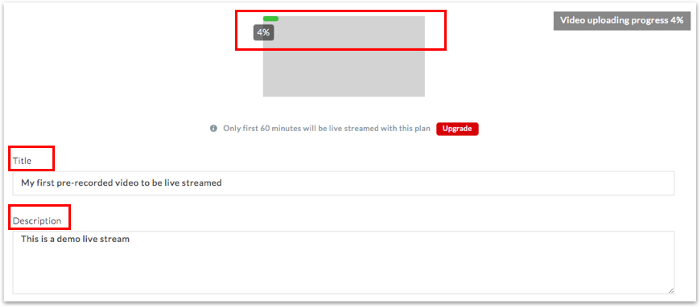
5. Edit Stream Details (optional)
You can see the video upload progress from the progress bar. While the video is being uploaded you can set your stream title and description that will appear on the social account during live streaming.
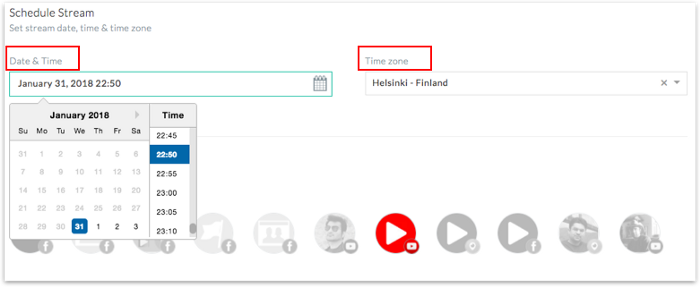
Scroll down to set up live streaming date, time and time zone. Do not forget to choose social account or accounts you want to live stream to. If you do not choose any specific date and time, your video will start to stream one minute after uploading has finished.
6. Create Steam
Click Create Stream button and that is it. You are done!
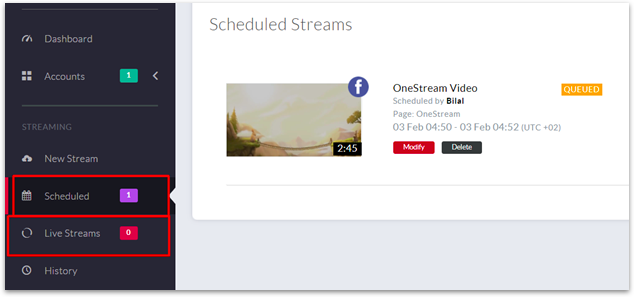
7. View Ongoing Live Streams
On the Sidebar you can click Scheduled or Live Streams tabs to view your scheduled videos and current ongoing live streams.
OneStream is an extremely reliable and efficient tool. Your streams will run smoothly without any screen pauses, glitches or quality issues giving your viewers the ultimate live streaming experience.
If you have any questions about OneStream please email their team at care@onestream.live
Comments
0 comments
Please sign in to leave a comment.