Let's say you've already added content to your Main Hall from the Program tab -- congrats! This article explains how to see that content in the Schedule page alongside all your other sessions. We also talk about how to add information to the Session Page that is automatically created for your Main Hall content.
Accessing the Main Stage Sessions from Your Event Schedule Page
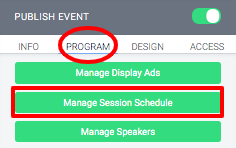
From the Main Page of your event, go to the "Program" tab and click "Manage Session Schedule."
This will bring where you can see all your scheduled sessions in one place, including the Main Stage Sessions you just added. It also serves as the page where you can add and manage other sessions, we cover how to this in the guide: How to Create Session Schedules and Add Speakers.
Step 1: Add the Schedule Link to Your Header
This is very important to do so that all Attendees and Exhibitors can see the schedule and the goings on at your event!
Let's take a look at the top of the page.

- Page Title: You can rename the page to change how it displays in the bar. For example, it could be Schedule, Sessions, Retreat Schedule, Breakout Rooms, etc.
- Show Schedule Link in Header: If you toggle this on, the Schedule page link (with whatever name you entered) will appear at the top of your page. It will then be accessible from every page of your Event (including at the top of booth pages).
- Upload Cover Image: click this button to upload an image for the top of this page.
- File types: Images only - jpeg, jpg and png.
- Recommended Dimensions: 1600px by 500px. You're welcome to upload an image with different dimensions, the page will display a crop preview for you to adjust and then crop to the appropriate size.
- and 5. are not covered in this article, please click here to learn more.
Step 2: Scroll Down to See Your Main Stage Sessions
As you scroll down the page, you will see that the Main Stage Sessions that you just added from the Program tab on the Main Stage appear on this page as well!

You may have noticed that on Friday, we have both Main Hall Sessions and Booth Sessions scheduled. They appear interwoven with their respective start times on this Schedule page.
You can see that the labels on the right denote whether this is a Main Hall session, or Booth Sessions.

You can see here that all the details you added previously appear on the schedule page, including the Start time, Title, and Mini Description.

Step 3: Click to go to a Session Page

Click on the Title or Description are to be taken to the Session Edit page.

Step 4: Add Details and Speakers to the Session Page
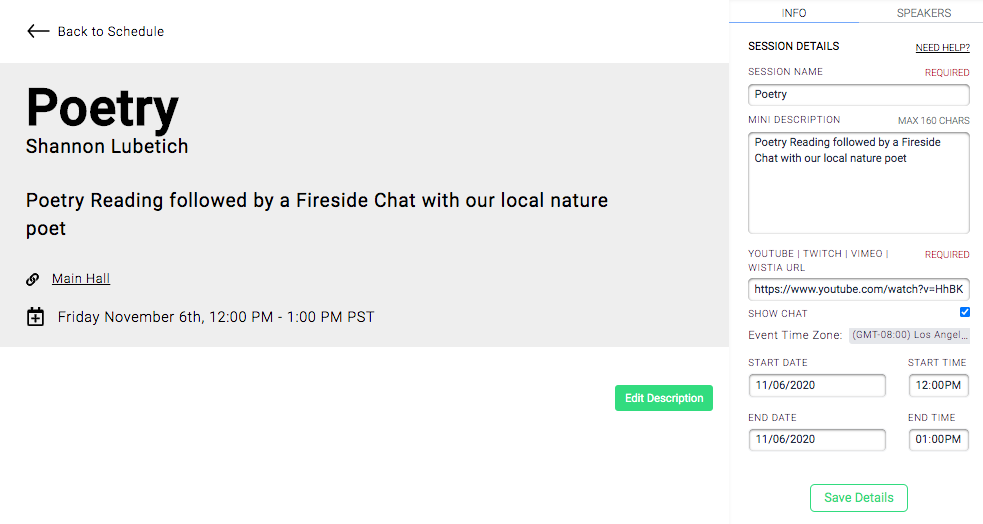
You can add more detail about this Main Stage Session by clicking the "Edit Description" button. This description will only appear on this page, not on the Main Hall or in the Schedule Page preview text. That preview text is the "Mini Description" in the right editing sidebar.
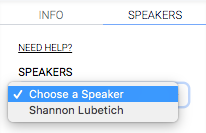
You can also associate a Speaker with this session, by clicking over into the Speaker tab at the top right of the editing sidebar. This is an optional step.

If you don't see any Speakers in this dropdown, it's because you haven't added them! We cover how to add them (and more) in-depth here: How to Create Session Schedules and Add Speakers.
Step 5: Watching the Main Stage Content
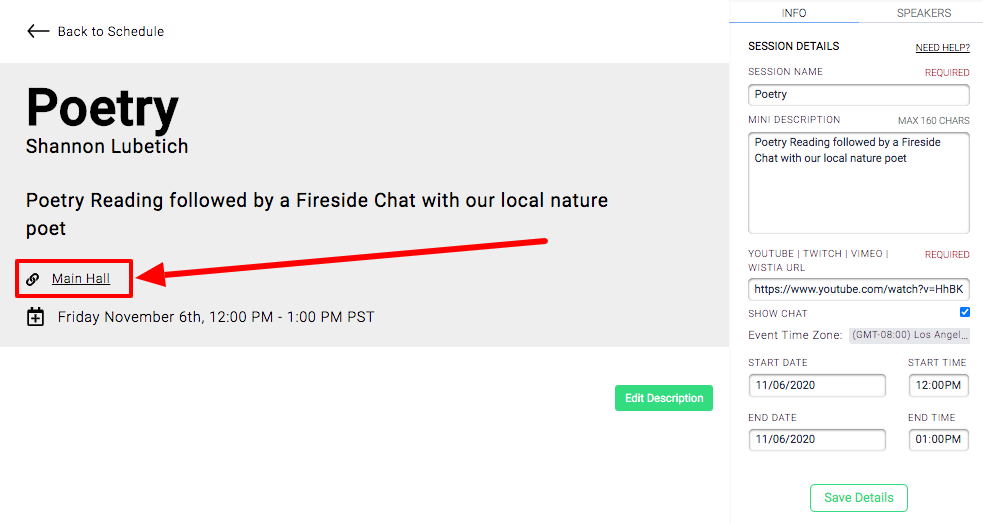
The Main Stage content will autoplay if someone is just on the Main Hall page, or clicking around booths. But you can also access this from the Session page, by just clicking the little link icon.

This will take the user to the Main Hall page, where, if it's during the time this content is live, the content will be autoplating at the top of the page!


Comments
0 comments
Please sign in to leave a comment.