
NOTE: You need to have a monetized YouTube account to enable live streaming on our site.
Please review this article on live streaming restrictions to see if your account is eligible.
How to enable live streaming on YouTube
Live streaming is disabled on new YouTube channels by default. Here’s how to enable it:
- You need a monetized YouTube account in order to have your livestream embedded on a third-party site. This is required for it to be able to play on the EventHub page.
- Verify your YouTube account. It’s a simple process. Select your country, preferred verification code delivery method, and enter the number of a mobile phone you have access to. Punch in the six-digit verification code when you get it to verify your account.
- Enable live streaming via the channel features page, the YouTube Studio live events page, or the Live Control Room.
- Wait 2-3 days for live streaming to activate on your account.
How to live stream on YouTube
-
- Log into your YouTube account and click the “Create a video or post” button in the top-right corner of the screen.
- Select “Go Live” from the drop-down menu.
- If prompted, give YouTube and your browser any required permissions for live streaming (i.e., camera, microphone).
- In the Live Control Room, ensure “Webcam” is selected in the navigation bar at the top.
- Give your live stream a title
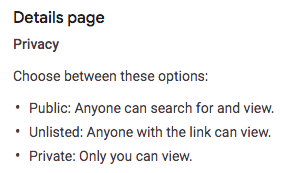
- Select a privacy setting. To allow this Livestream to be viewed on EventHub, you need to set the privacy setting as either Public or Unlisted. This excerpt from YouTube explains the different privacy settings:
-
- Choose whether you’d like to live stream now or schedule an event for later.
- Click “More options.” Select your camera and microphone from the drop-down menus if they aren’t listed already.
- Click “Advanced settings” to toggle chat, age restriction, and monetization (YouTube Partner Program members only).
- Press “Next” and pose for a thumbnail. Mouse over the thumbnail to bring up options to take another picture or upload a custom thumbnail from your computer.
- Hit “Go live.”
That’s it. Remember to press “End Stream” when you’re finished. YouTube will automatically upload an on-demand version of the live stream to your channel so viewers who missed it can play it back. You can see and manage all your current, scheduled, and past live streams within the “Manage” tab in the Live Control Room.
Comments
0 comments
Please sign in to leave a comment.