First off, you need an account with RegFox. Sign up here: https://signup.regfox.com/
If you already have an account with RegFox, sign in here: https://auth.regfox.com/
We cover the following topics on this page. Click on a section to jump to it:
- Creating a Registration Page on RegFox
- Connecting RegFox to your Event on EventHub
- How to Import Attendees from RegFox
- How Your Attendees Access the Event
Creating a Registration Page on RegFox
Then, you need to create a RegFox "Page" for your event. Please refer to this page from RegFox on how to do that: https://www.regfox.com/launch-guide
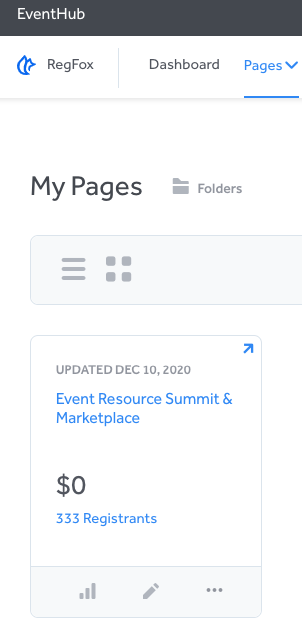
Once you've set up a Page in RegFox, you should be able to see it by logging into RegFox, clicking "Pages" on the top navigation bar, and then clicking "View All Pages" from the dropdown.
It should look something like this:
If you want to make changes to your Page, or paid registration, that is all on RegFox. Please refer to their documentation on how to do this. If you have questions about this, please refer to RegFox's support page here: https://help.regfox.com/en/
Connecting RegFox to your Event on EventHub
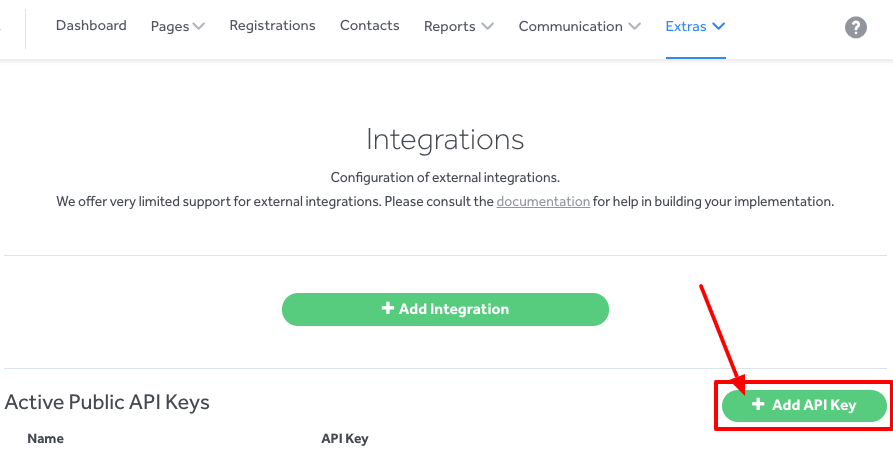
1. On RegFox, choose Extras from the top navigation bar, and then select Integrations from the dropdown.

2. Click the green Add API Key on the lower right of the page.
3. Enter a helpful phrase for your "Key Name," whether that's your event name, EventHub, etc. and then click Update Key.
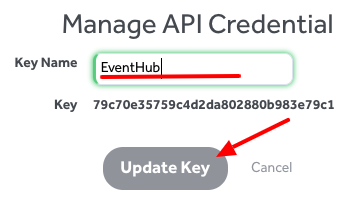
4. You will need to refresh the page to see your newly added key.

Double-click the API Key to highlight it, then copy this string of letters and numbers. In this example, it's "79c70e35759c4d2da802880b983e79c1."
5. Return to your event on EventHub. Make sure you're on your Virtual Village, on the Main Hall page. In the editing sidebar on the right, click into the Access tab.
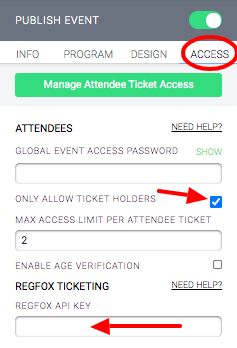
Make sure to check "Only Allow Ticket Holders."
Then paste in that API Key from RegFox. This section of the tab will change to look something like this:
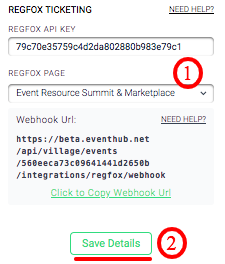
- There will be a dropdown of your pages in RegFox. If you only just created one for this, it will be the only option. But, if you have multiple, click this dropdown and select the RegFox page related to this event.
- Click Save Details before you do anything else to save this integration. Then move on to the next step.
6. Now, click the green text that says "Click to Copy Webhook Url" under the url that was generated. This will copy the URL to your clipboard.
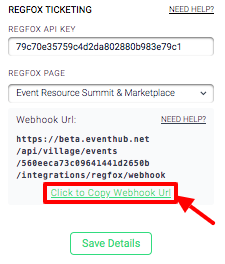
7. Return to RegFox. Like before, choose Extras from the top navigation bar, and then select Integrations from the dropdown.

8. Click the Add Integration button in the middle of the page.
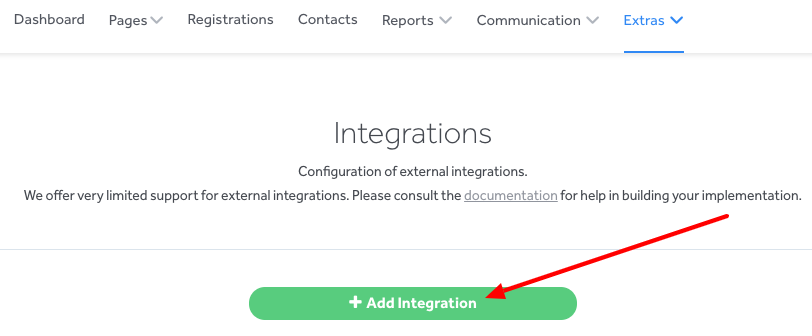
9. Click the far left icon on the pop up. (It's blue and it looks like a triangle/recycling symbol/fidget spinner.)
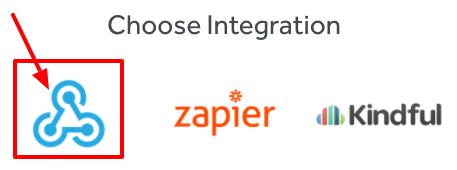
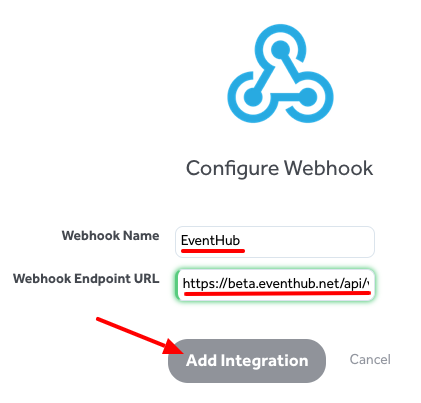
10. Again, enter whatever name you would like for the WebHook Name. It can be "EventHub" or your event name, or something else. It doesn't have to be the same as your API Key name.
Then, paste in the Webhook URL you copied from EventHub in the Webhook Endpoint URL field.
Click Add Integration.
11. This will take you to the Webhook Settings page. You will see that on the left, the Name and URL you entered are here.
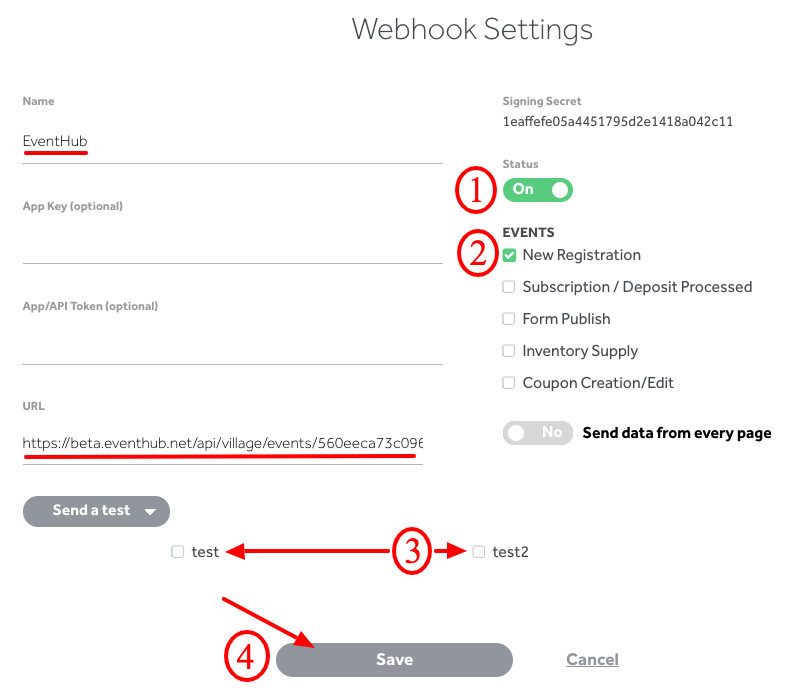
On the right, you need to
- Toggle Status to On
- Check New Registration under "Events"
- In the section where some of your pages are listed, if your page name appears here, check it. If it does not, don't do anything. (In our case, we don't do anything.)
- Click Save
12. Once you've saved this Webhook, you can test to make sure it's working! Click on the Send a test dropdown, and choose Send a Registration.
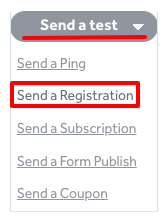
It might take a second, but then you'll get a pop up that confirms you "Successfully sent a registration webhook."
13. You can additionally confirm that this was sent by looking at the bottom of this page under the "Recent Deliveries" section. Right after you send it, you will see a Registration event with a small clock icon so show that it's processing, but it will change to a green checkmark when it goes through.

You might have to click the Refresh button to see that it's confirmed with a green checkmark.

You can click the three dots on the right to learn more information.
14. Return to your event on EventHub.
15. On the right editing sidebar, click into the Access tab and click the Manage Attendee/Speaker Access button.
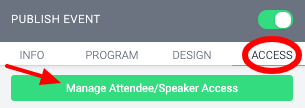
If the RegFox test registration event went through correctly, you should see the following:

If you do not see this test registration, please reach out to us at help@eventhub.net for support.
If you do see it, voila! You're all set. Now, when people register for the event from your RegFox page, they will automatically appear here on EventHub and be granted access to the event.
On-Demand Registration from Your Event Page
Let's say you don't want to force people to register in advance, but want to allow people to register "at the door" of the event. For your Virtual Event, that means they try to access your event URL, but see that it's Ticketed and they don't have a ticket.
We have integrated a feature so that they can register for your event right from that page!
With this feature, when they go to access your event, they will be greeted by this page:
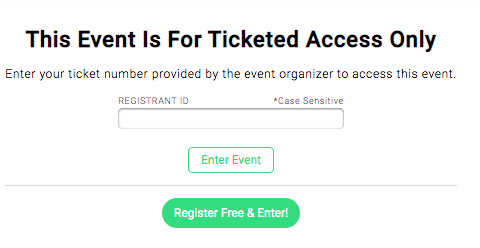
If they've pre-registered and have a ticket, they can paste it here and enter.
If they do not, they can just click the Register Free & Enter button, which will open up this view right on the same page with your RegFox page embedded on our site. Might look something like this:
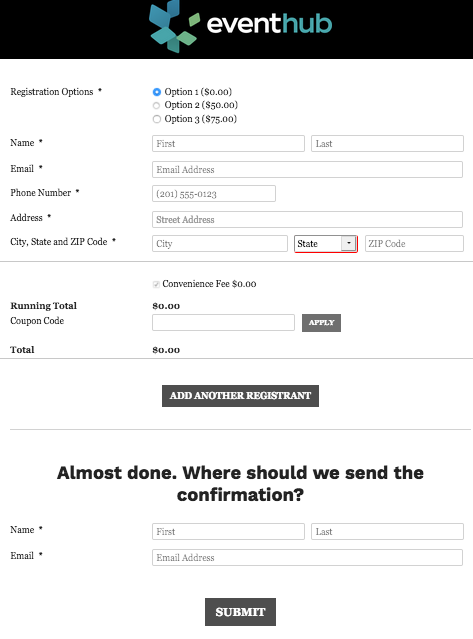
If you're charging for your event, this pop up will collect Credit Card information. Remember, everything you see here is controlled entirely by RegFox. If you want to make changes to how this page appears, you need to do so from your RegFox account.
Follow these steps to add On-Demand Registration to your Event!
1. Go back to your Main Hall Event page in Edit Mode. Click into the Access tab on the right editing sidebar.
2. Look to the bottom, where you'll see two additional fields related to RegFox.
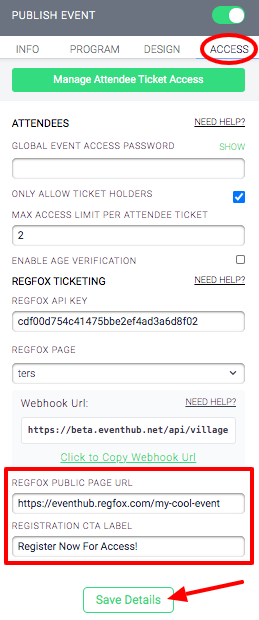
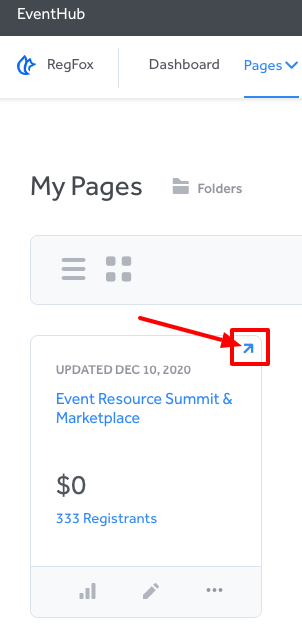
First, you need to enter your RegFox Public Page URL. This is the URL to the page that someone would go to to register for a ticket to your event. From RegFox, from My Pages, you can click the small pop-out arrow to open this webpage. You can copy + paste the url from there.
Then, if you'd like to, you can add custom text as the Registration CTA Label that will show up on your button on the ticketed access page. If you don't enter anything here, it will default to "Register for Access."
Remember to click Save Details at the bottom of the sidebar!
Now, when someone comes to your event, it'll look something like this, and they can sign up right there!
How to Import Attendees from RegFox
If you'd already started collecting registrations using RegFox before connecting to EventHub, you need to import that old data. Otherwise, it will not be tied in with EventHub!
To do this, on your event's main page on EventHub, go to the Access tab -> Manage Attendee/Speaker Access.

From here, click the Management Actions dropdown on the far right. Then choose RegFox Bulk Import.
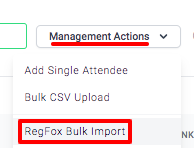
A notification will alert you that this has started, and after a few moments, the page should populate with all your old registrations.
How Your Attendees Access the Event
Because you checked "Only Allow Ticket Holders" in your Event Access settings, if someone tries to access your event by going to the main page, they will see a pop up like this:
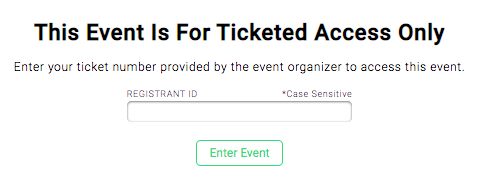
In order to get past this, they need to have their ticket number.
Let's take a look at a single ticket under Access tab -> Manage Attendee/Speaker Access.

Attendees have two options for accessing an event.
- Send them your Event URL and their Ticket # generated from RegFox. (The box on the left in the screenshot above.)
- To get the Public Event URL, return to your Event Main Page and click Attendee View in the top black bar. Then copy the URL in the browser address field.
- When they go to the event page, they will see the pop up in the screenshot above. They will paste their Ticket # in and click "Enter Event," which will allow them access.
- Send them their access link.
- Click on the green Copy access link text on the right to copy a unique URL to your clipboard. Send them this URL. When they click on it, it will take them directly to the event page, with not ticketing pop up.
- We do not automatically send this link out to folks. If you want to send it out, you'll either have to
- copy the access link by clicking on a ticket individually, or
- choose Export All Attendees from the Management Actions dropdown and use the csv file to populate an email template on an email marketing platform.


Comments
0 comments
Please sign in to leave a comment.