You control who has access to your event. The default settings shown below will allow anyone to access your event and the virtual vendor village. There are several ways you can restrict this, which we explain in depth below.
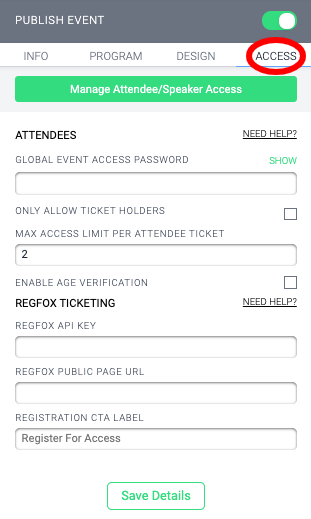
Setting an Access Password
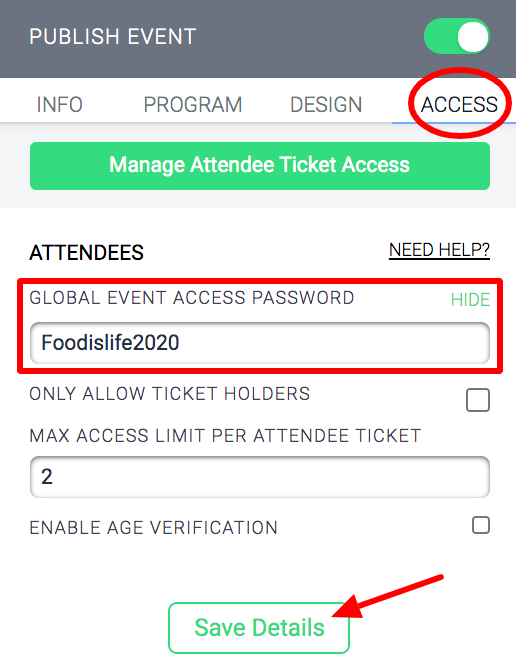
While in Edit Mode on your Event Page, you can add a "Global Event Access Password" under the Access tab on the edit sidebar. Click "SHOW" in Green to see the characters you're typing, otherwise it defaults to appearing as *** as you type it. Click "Save Details" at the bottom to enable this Access Password. Now, when someone attempts to follow your event's URL, they will be directed to the following page.
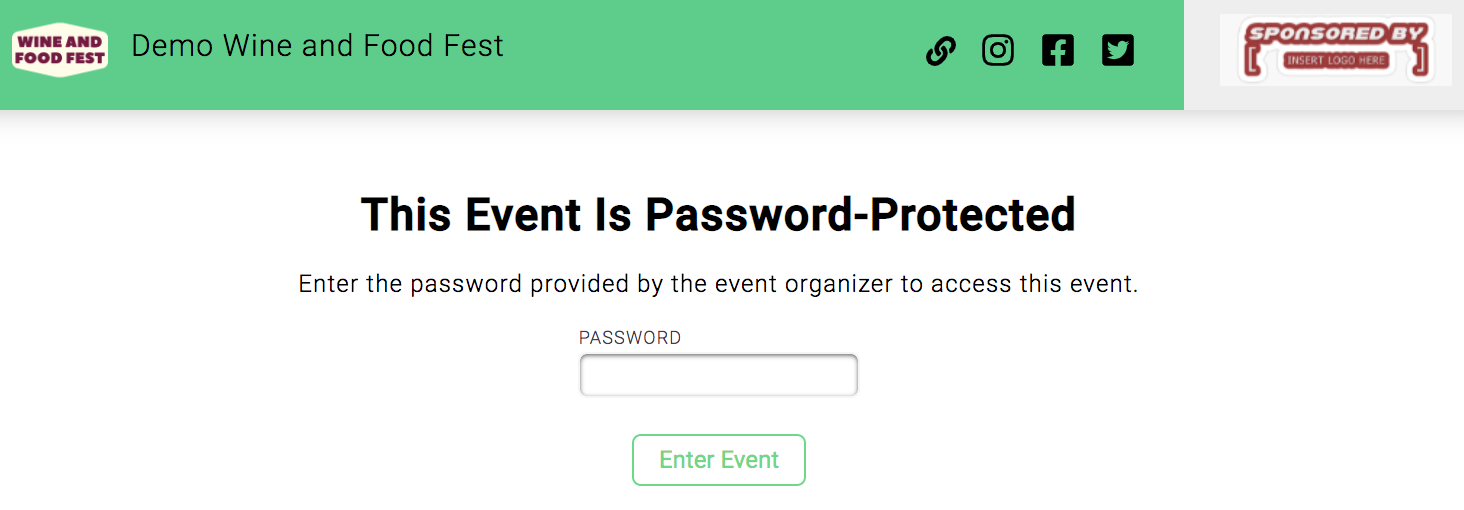
If you have sent out the access code, they can enter it to proceed with accessing this event. This access code page will come up when people first try to access the main event page and all the booth pages. Once they're "logged in" with this Access Password to the event, they can navigate around without having to enter it again.
Restricting Access to Ticket Holders only
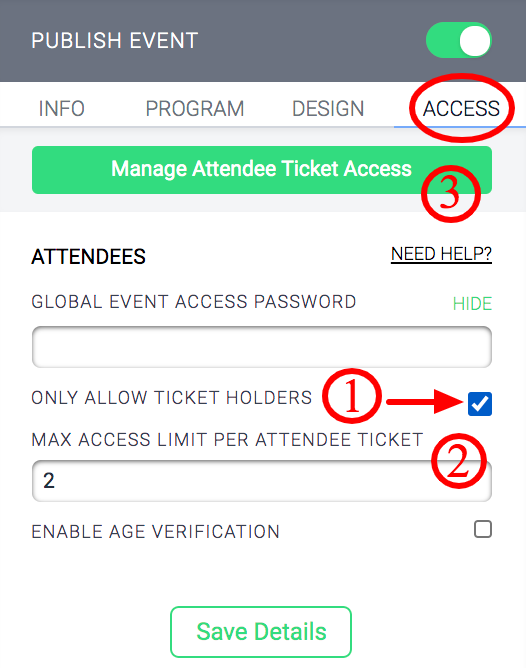
- Only Allow Ticket Holders: Check this box If you want to only allow people who got a "ticket" to access the event.
- Max Access Limit Per Attendee Ticket: Each ticket holder will receive a unique URL to access the event. Use this field to enter the number of devices this unique URL can be used on. If you want them to only be able to access once, on one device, put in 1. But if they might access it on their phone, and their desktop, you can put in 2. The device will remember this access for up to a year, or until the attendee clears their cookies.
- Manage Attendee/Speaker Access: Click here to load all ticket holder info into EventHub.
You must use an external ticketing service for attendees to get tickets. There are several services out there, some are free and some cost, where you can charge or offer free tickets to attendees. Let your Account Manager know your preferred platform, and they'll help you integrate with it.
Want to skip the manual ticket tracking? Integrate with RegFox!
We recommend using RegFox, and have built an integration with their services. For a step-by-step guide on how to integrate with RegFox, please refer to this tutorial. RegFox will collect registration for your event, and it will automatically import into EventHub. It takes care of all the otherwise manual steps you'd have to follow below.
Follow these steps if you're adding tickets manually
After ticket sales have ended, you need to load all the ticket holders' info into EventHub, so the platform knows they are approved for access. You do this by clicking on the Manage Attendee/Speaker Access button. Which pops up a page like this:

- You can bulk upload ticket holders by loading in a file in CSV format as TicketNumber,FirstName,LastName,Email.
- If you want to upload them one at a time you need First name, Last name, Email Address, and to set their ticket number.
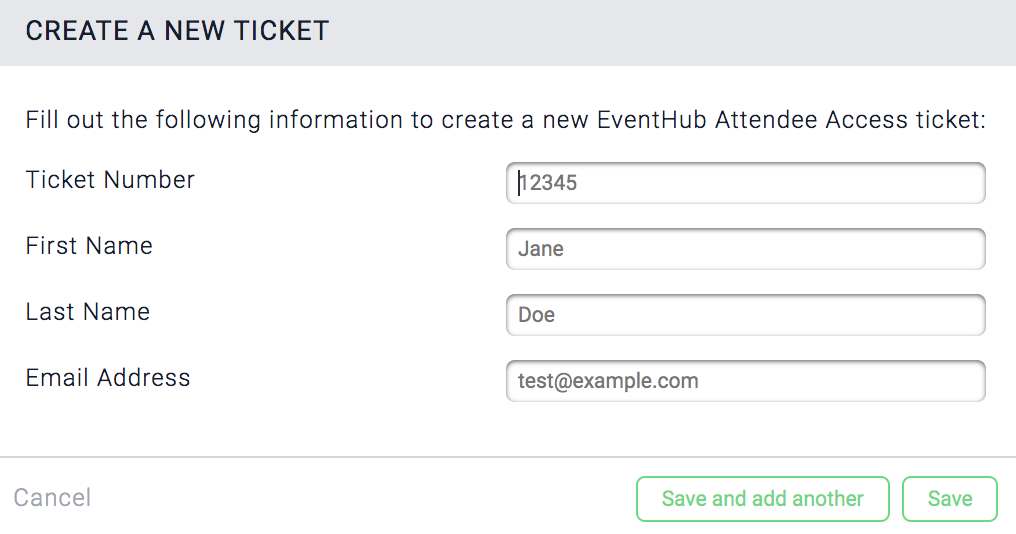
Once you add a ticket holder, they will appear in the list below, where you can see how many times they've used their unique link, revoke access, and copy their access link to share it with them.

NOTE: The Attendee Ticket Usage Limit is based on device not IP address. If you want attendees to only be able to access once, on one device, put in 1. But if they might access it on their phone, and their desktop, you can put in 2. The device will remember this access for up to a year, or until the attendee clears their cookies.


Comments
0 comments
Please sign in to leave a comment.