
Take a look at an example of an event using these features in the video below, then learn how to add them yourself!
This tutorial includes the following topics:
- Adding a Speaker
- Editing a Speaker's Info
- Deleting a Speaker
Adding a Speaker
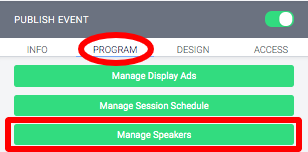
From the main page of your event, click "Manage Speakers" in the editing sidebar under the Program tab.
This will bring you to a page where you can add and manage speakers.
First, let's take a look at the top of the page.
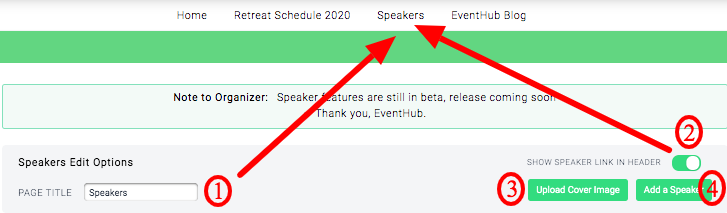
From here you can:
- Page Title: You can rename the page to change how it displays in the bar. For example, it could be Speakers, Presenters, Partners, Our Favorite People, etc.
- Show Speaker Link in Header: If you toggle this on, the Speaker page link (with whatever name you entered) will appear at the top of your page. It will then be accessible from every page of your Event (including at the top of booth pages).
- Upload Cover Image: click this button to upload an image for the top of this page.
- File types: Images only - jpeg, jpg and png.
- Recommended Dimensions: 1600px by 500px. You're welcome to upload an image with different dimensions, the page will display a crop preview for you to adjust and then crop to the appropriate size.
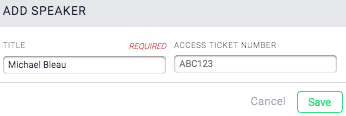
- Add a Speaker: click this button to add a speaker to the page. You will then see a pop up to enter Title and Access Ticket Number. For more on ticket number and what this means, click here to jump to the section on Ticketing Access.
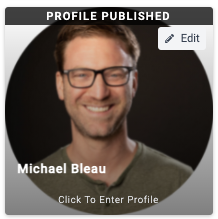
Once you hit save, that person will appear below in the Speaker page as a thumbnail. Click on their thumbnail to edit.
Editing a Speaker's Info
The edit page will look like this (but with nothing filled in yet).
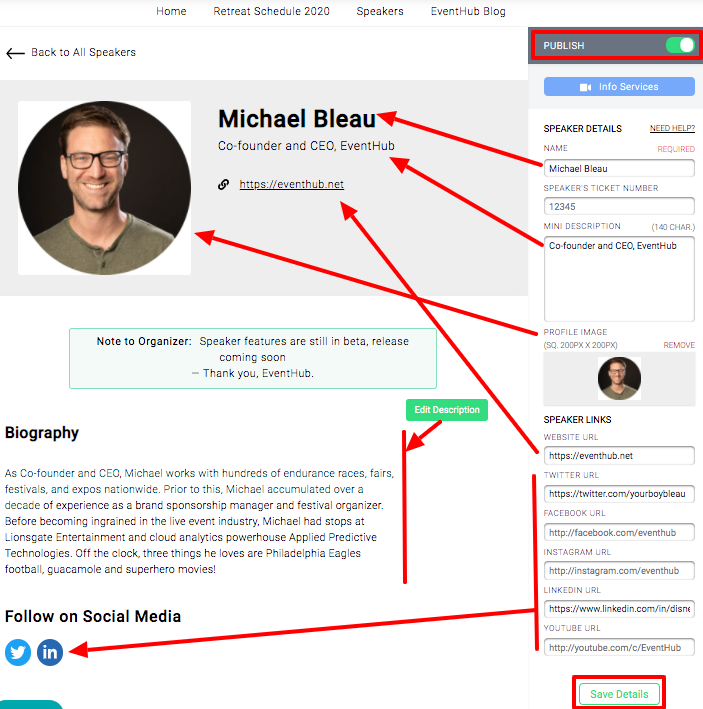
You can fill in all this info with the editing sidebar on the right, or send it to the Speaker to fill out themselves. Please send them this guide covering how they can access and edit their pages.
In order to allow the speaker to access this page, you must toggle "Publish" on to green at the top of this sidebar before sending it to them.
Deleting a Speaker
To delete a Speaker, go back to your Speakers page. Each person should have a small "Edit" button in the upper right hand corner of their tile.
Click this button, it'll bring up a pop up where you can edit their name or ticket info.
Click the Delete button in the bottom left of this pop up. 
It will ask you to type "DELETE" to confirm. After you do this, the speaker and their access will be removed from your event. They will be no longer visible on the Speakers Page, even to you in Edit Mode.
Comments
0 comments
Please sign in to leave a comment.