For an overview of adding Speakers and Sessions to your event, please refer to this tutorial: CLICK HERE.
This article specifically covers how to add tickets for Speakers and share their unique ticket number or access link with them so that they can edit their Speaker and Session pages and have Admin access to their Session's live chat.
How to Add a Speaker to your Event
From the main page of your event, click "Manage Speakers" in the editing sidebar under the Design tab.
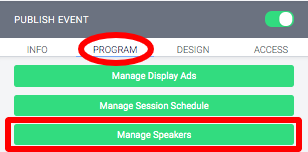
This will bring you to a page where you can add and manage speakers.
First, let's take a look at the top of the page.

If you have questions about this screenshot and page, you need to refer to the overview tutorial: CLICK HERE.
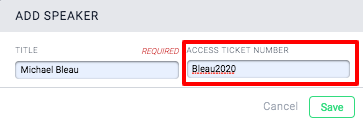
4. Add a Speaker: click this button to add a speaker to the page. You will then see a pop up to enter Title and Access Ticket Number.
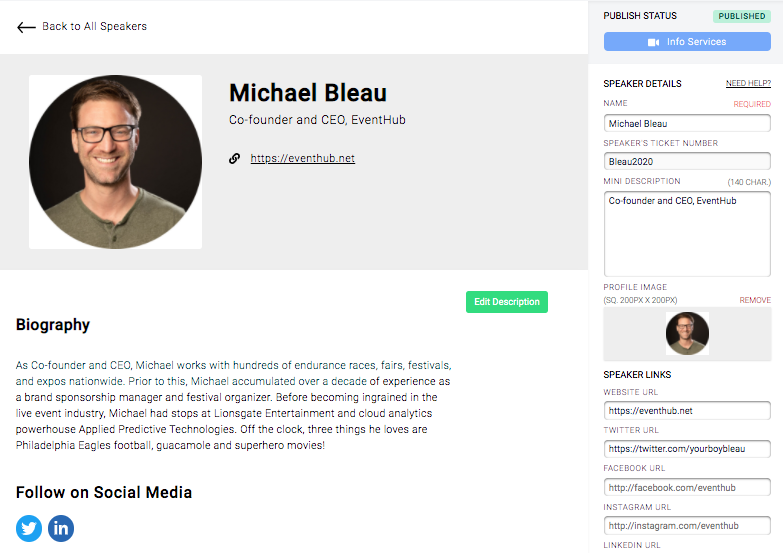
If you forgot to add an Access Ticket Number for a speaker when you first added them, don't worry, you can still do so from their Speaker Profile page. To access this, click on their thumbnail on the speaker page, and refer to the "Speaker's Ticket Number" field in the editing sidebar.
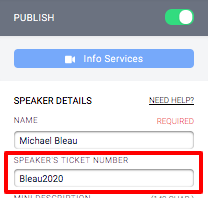
This ticket number can be a combination of letters and numbers, it's helpful to use something related to the speaker you're adding. For example, we made the code for Michael Bleau as "Bleau2020." Every Ticket Number needs to be unique, so each person needs a different code. You can't just use "EventSpeakerTicket" for all of them.
To whitelist this ticket for access, you need to return to your main page, you can click the Main Hall link in your header (if you've enabled it) or the Event Name in the top bar.
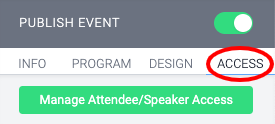
From here, go to the "Access" tab in the editing toolbar and click on "Manage Attendee/Speaker Access."
From the Management Actions dropdown, click 'Add Single Attendee,' and make sure to enter the same code we saved as the Speaker's Ticket Number in the pop up.
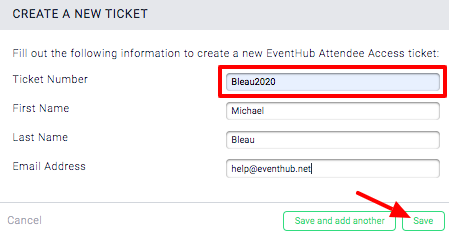
Once you hit 'Save,' you'll see this new speaker added in your list of ticketed attendees.
 To allow your speakers access to the event, you need to
- Send them the Public Event URL and their Ticket Number you created.
- To get the Public Event URL, return to your Event Main Page and click Attendee View in the top black bar. Then copy the URL in the browser address field.
- OR Send them their access link.
- Click on the green "Copy access link" text to copy a unique URL to your clipboard. Then, write a message to them and just paste it in.
When a speaker tries to access your event page by clicking the public event URL, they will encounter a page that looks like this:
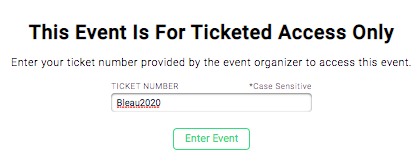
After they type in their code, they will have access.
Speakers Can Edit Their Own Pages
That's right -- you don't have to fill in all their info for them! Once you give a speaker their ticket number and the URL to your event, they will be met by this page:

Once they enter the correct Ticket Number and click 'Enter Event,' they will be taken to your event's home page, but in the Attendee View state.
They can also access this by just clicking their Unique Access Link if that's what you choose to send them instead of the ticket number. If they have another account with EventHub, they'll need to use this link in a new Private Browsing or Incognito window.
To edit their page, they need to click "Speakers" in the top bar Header Navigation.
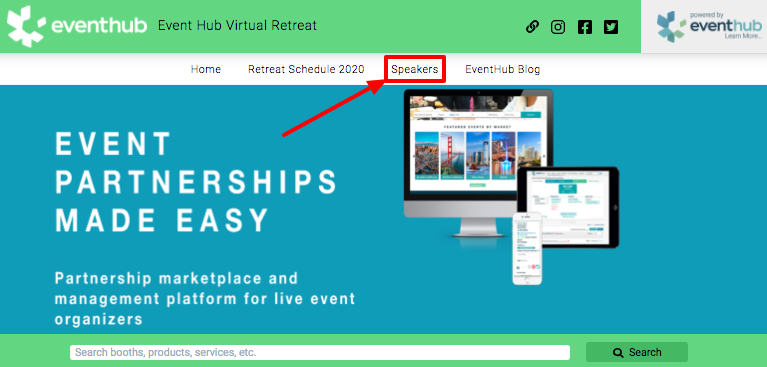
On this page, they will see all published speakers. They can click on themselves to be entered into an edit page.
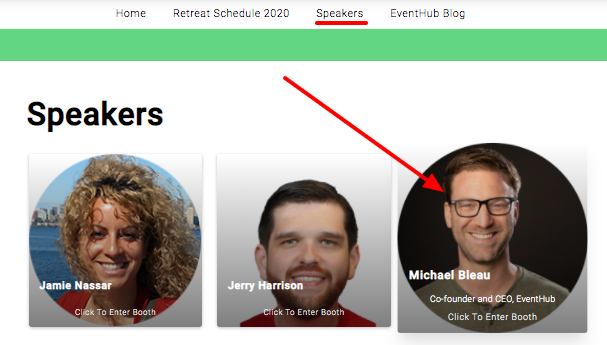
Don't worry, a speaker cannot edit anyone else's page. They can only edit the Speaker Profile that has the corresponding Ticket Number and is therefore associated with their account.
For more info on this, please refer to this guide we made for you to share with speakers on how to edit their own pages: CLICK HERE.
Other Articles
If you're looking for information on how to gate your event, either to ticket-holders only or with a Global Access Password, please refer to our tutorial on Ticket Accessed Events.


Comments
0 comments
Please sign in to leave a comment.