
Custom Branding Bundle
This upgrade includes everything that the Logo Swap upgrade includes, but adds on the ability to customize colors and fonts across your event.
When you click Manage Advanced Styles under the Design tab, you will see the following view:
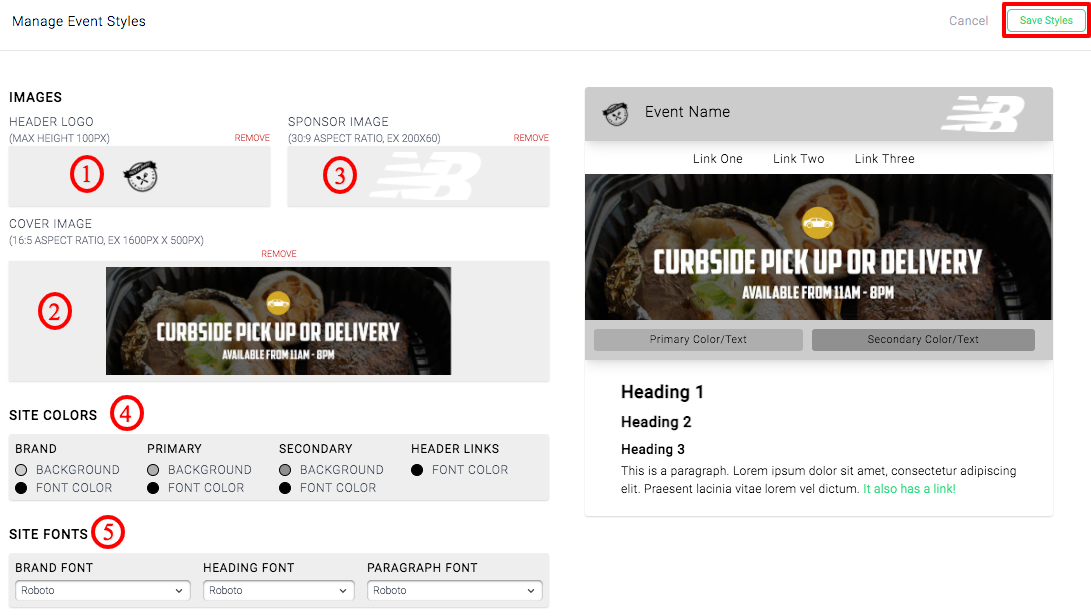
- Header Logo: This goes in the upper left of your event, across all pages.
- Cover Image: This appears at the top of your event's Main Hall landing page.
- Sponsor Image: This is included in all upgrades. Upload an image here to replace the default "Presented by EventHub" logo in the upper right corner of all your event pages. To learn more, refer to the Logo Swap upgrade tutorial.
We take a closer look at 4. Site Colors and 5. Site Fonts below.
4. Site Colors
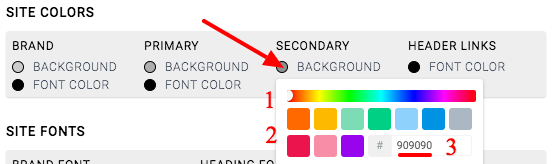
To change the color of one of these sections, click into the small circle of color to the left of the color's placement. This opens up a color picker. Here, you can set the colors in 3 different ways:
- Move the slider on the rainbow meter back and forth til you're on your desired color.
- Simply click on one of the color blocks we've provided you.
- Enter the hex code for your desired color. We recommend this Color Picker for finding your perfect code and getting what hex code it is. You can always google "color hex code" for more options!
Once you've chosen your new color, you'll see it reflected in the preview on the right.
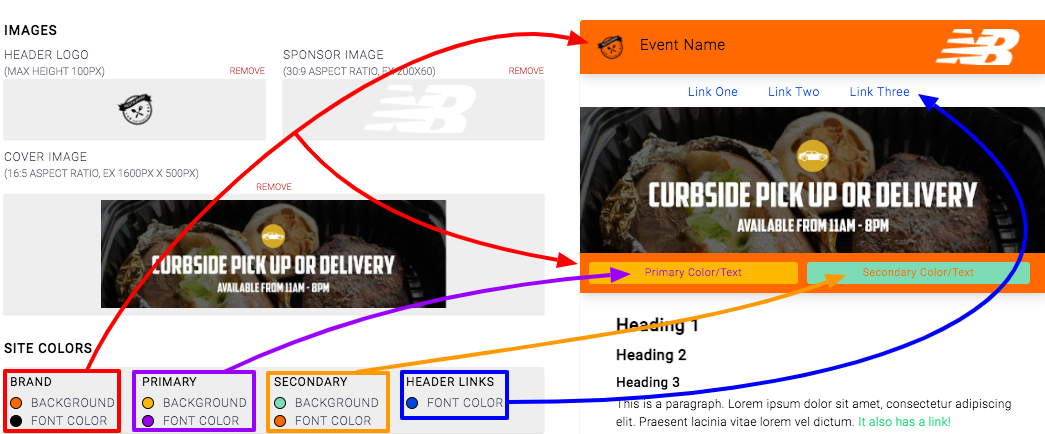
- The Brand section refers to the color of the background bar at the very top of the page, as well as below your cover image. The text color here affects the color of the text at the top of your page, which is typically your Event Name.
- The Primary section refers to the color of the background of Primary buttons, and the text on them, across your event.
- The Secondary section refers to the color of the background of Secondary buttons, and the text on them, across your event.
- The Header Links section only has a Font Color option, which corresponds the the color of the Header Link text just below your Event Name and above your cover image. Header Links can include links to your Main Hall, Schedule, or more! For more information on adding Header Links, click here to learn about adding links that go to pages on your event site, and click here to learn about adding links that go to other pages.
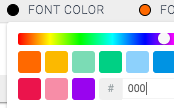
If you don't like the color you've chosen, and would like to go back to black, click into the hex code section and type "000". The color should change back to black:
Once you're happy with it, remember to click Save Styles in the upper right.
Congrats! You will now see your new custom colors on all the pages of your event!
5. Site Fonts

To change the font, click into the dropdown. This will open up a dropdown of all the fonts we support on our site (there are tons!). While you have the dropdown open, you can jump to a different font by pressing the keys of the first letters of that font name, for example, typing "Qw" would take you to the font "Qwigley."
When you choose a font, you'll see it reflected in the preview on the right.
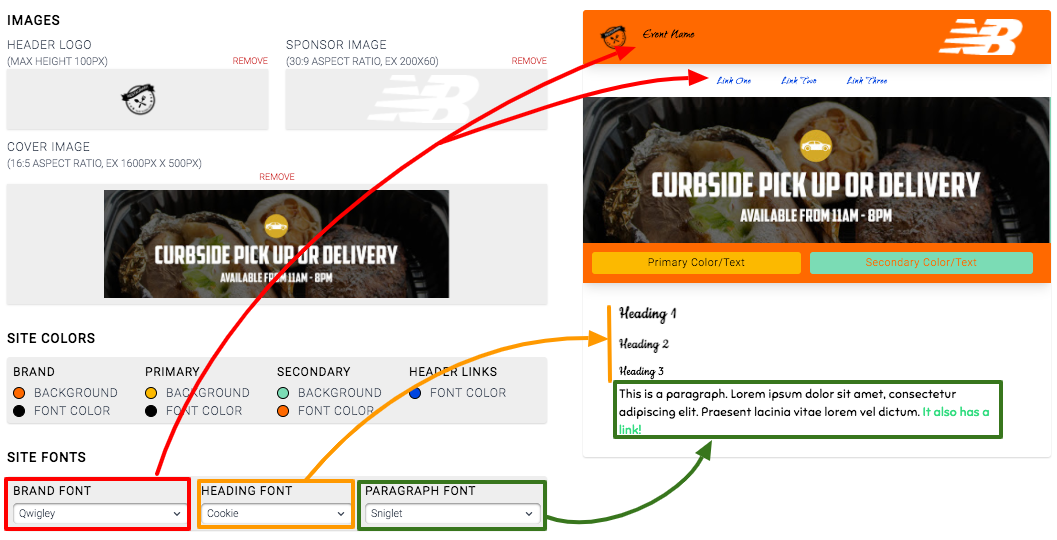
- The Brand Font affects the font for your Event Name and Header Links at the top of the page.
- The Heading Font affects font in the Description in the body of the page, across all pages. So the default text for Headings in the Description of your Main Hall, Booth, Session, Speaker page, etc., will all be set to this.
- The Paragraph Font similarly sets the default across all those pages, but for the paragraph body text.
Once you're happy with it, remember to click Save Styles in the upper right.
Congrats! You will now see your new custom fonts on all the pages of your event!
If you have questions, please email help@eventhub.net.
Comments
0 comments
Please sign in to leave a comment.