
Interactive floor plans are a great way to let you and your exhibitors keep up with what booths are taken and which are still available. To add an interactive floor plan to your event just follow the instructions below.
Section 1. Purchasing your floor plan token.
The first step is to purchase a floor plan token. If you already have one you can skip down to Section 2.
Please note: purchased floor plans will be added to your plan and will renew at the same time the plan does.
To begin purchasing your token first log in to your account at http://eventhub.net and proceed as follows.
1. Select "Account info" from your drop-down menu.
2. Select "Subscription Settings" from the left navigation.
3. Select the "Buy Floor Plan" button.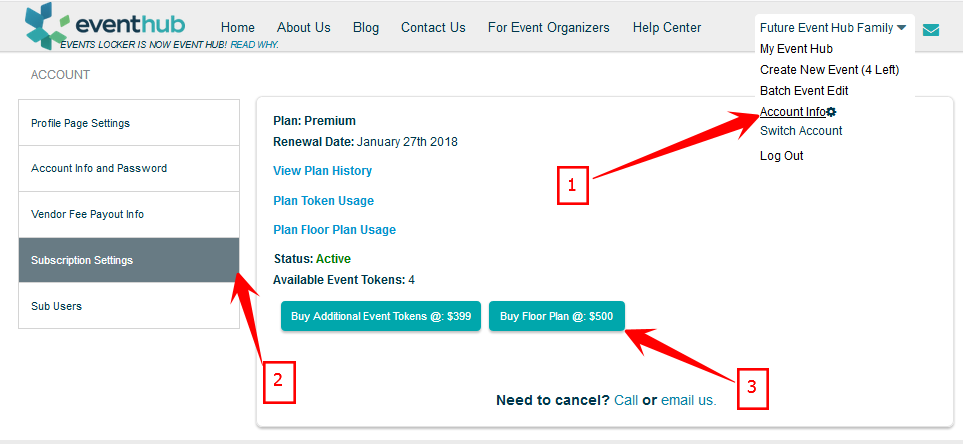
Next to complete your purchase follow these steps.
1. Enter any promo codes you may have and click "Apply code"
2. Select how many Floor Plans you want to purchase
3. Enter your billing information
4. Select "Purchase Floor Plan"

Section 2. Applying your floor plan token to your event.
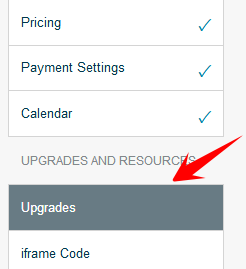
1. Navigate to the "Edit Showcase Page" section for the event you want to purchase the interactive floor plan for.

2. Select "Upgrades" on the left navigation.
3a. If you do not have a map token already purchased then you can purchase one by selecting "Purchase Floor Plan". Refer to Section 1 for how to complete the purchase.
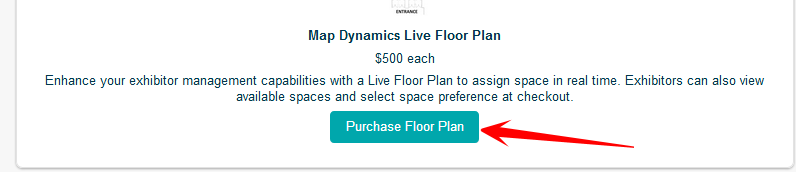
3b. If you already have a floor plan token purchased then you can Select "Add Floor Plan"

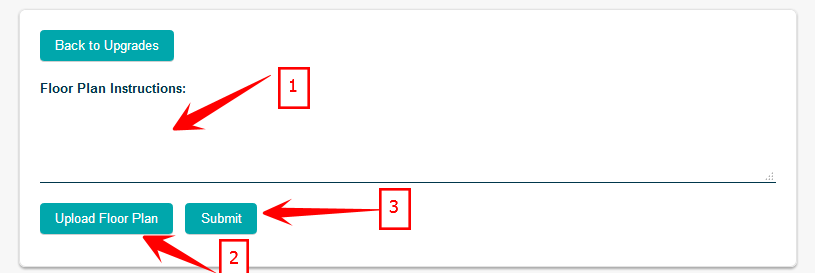
4. This is where you will provide the information for your floor plan.
1. Enter any special instructions you have for your floor plan in the text field.
2. Upload a High-Resolution PDF/Image of your floor plan (High Res PDF is preferred).
3. Select Submit.
Your Floor plan is now submitted! One of our representatives will contact you to walk you through the best map setup for your event. Please allow 5-7 business days for map completion.
Comments
0 comments
Please sign in to leave a comment.