

Topics Covered:
Note Before You Begin:
-
This feature is only available if you have purchased the Live Floor Plan upgrade
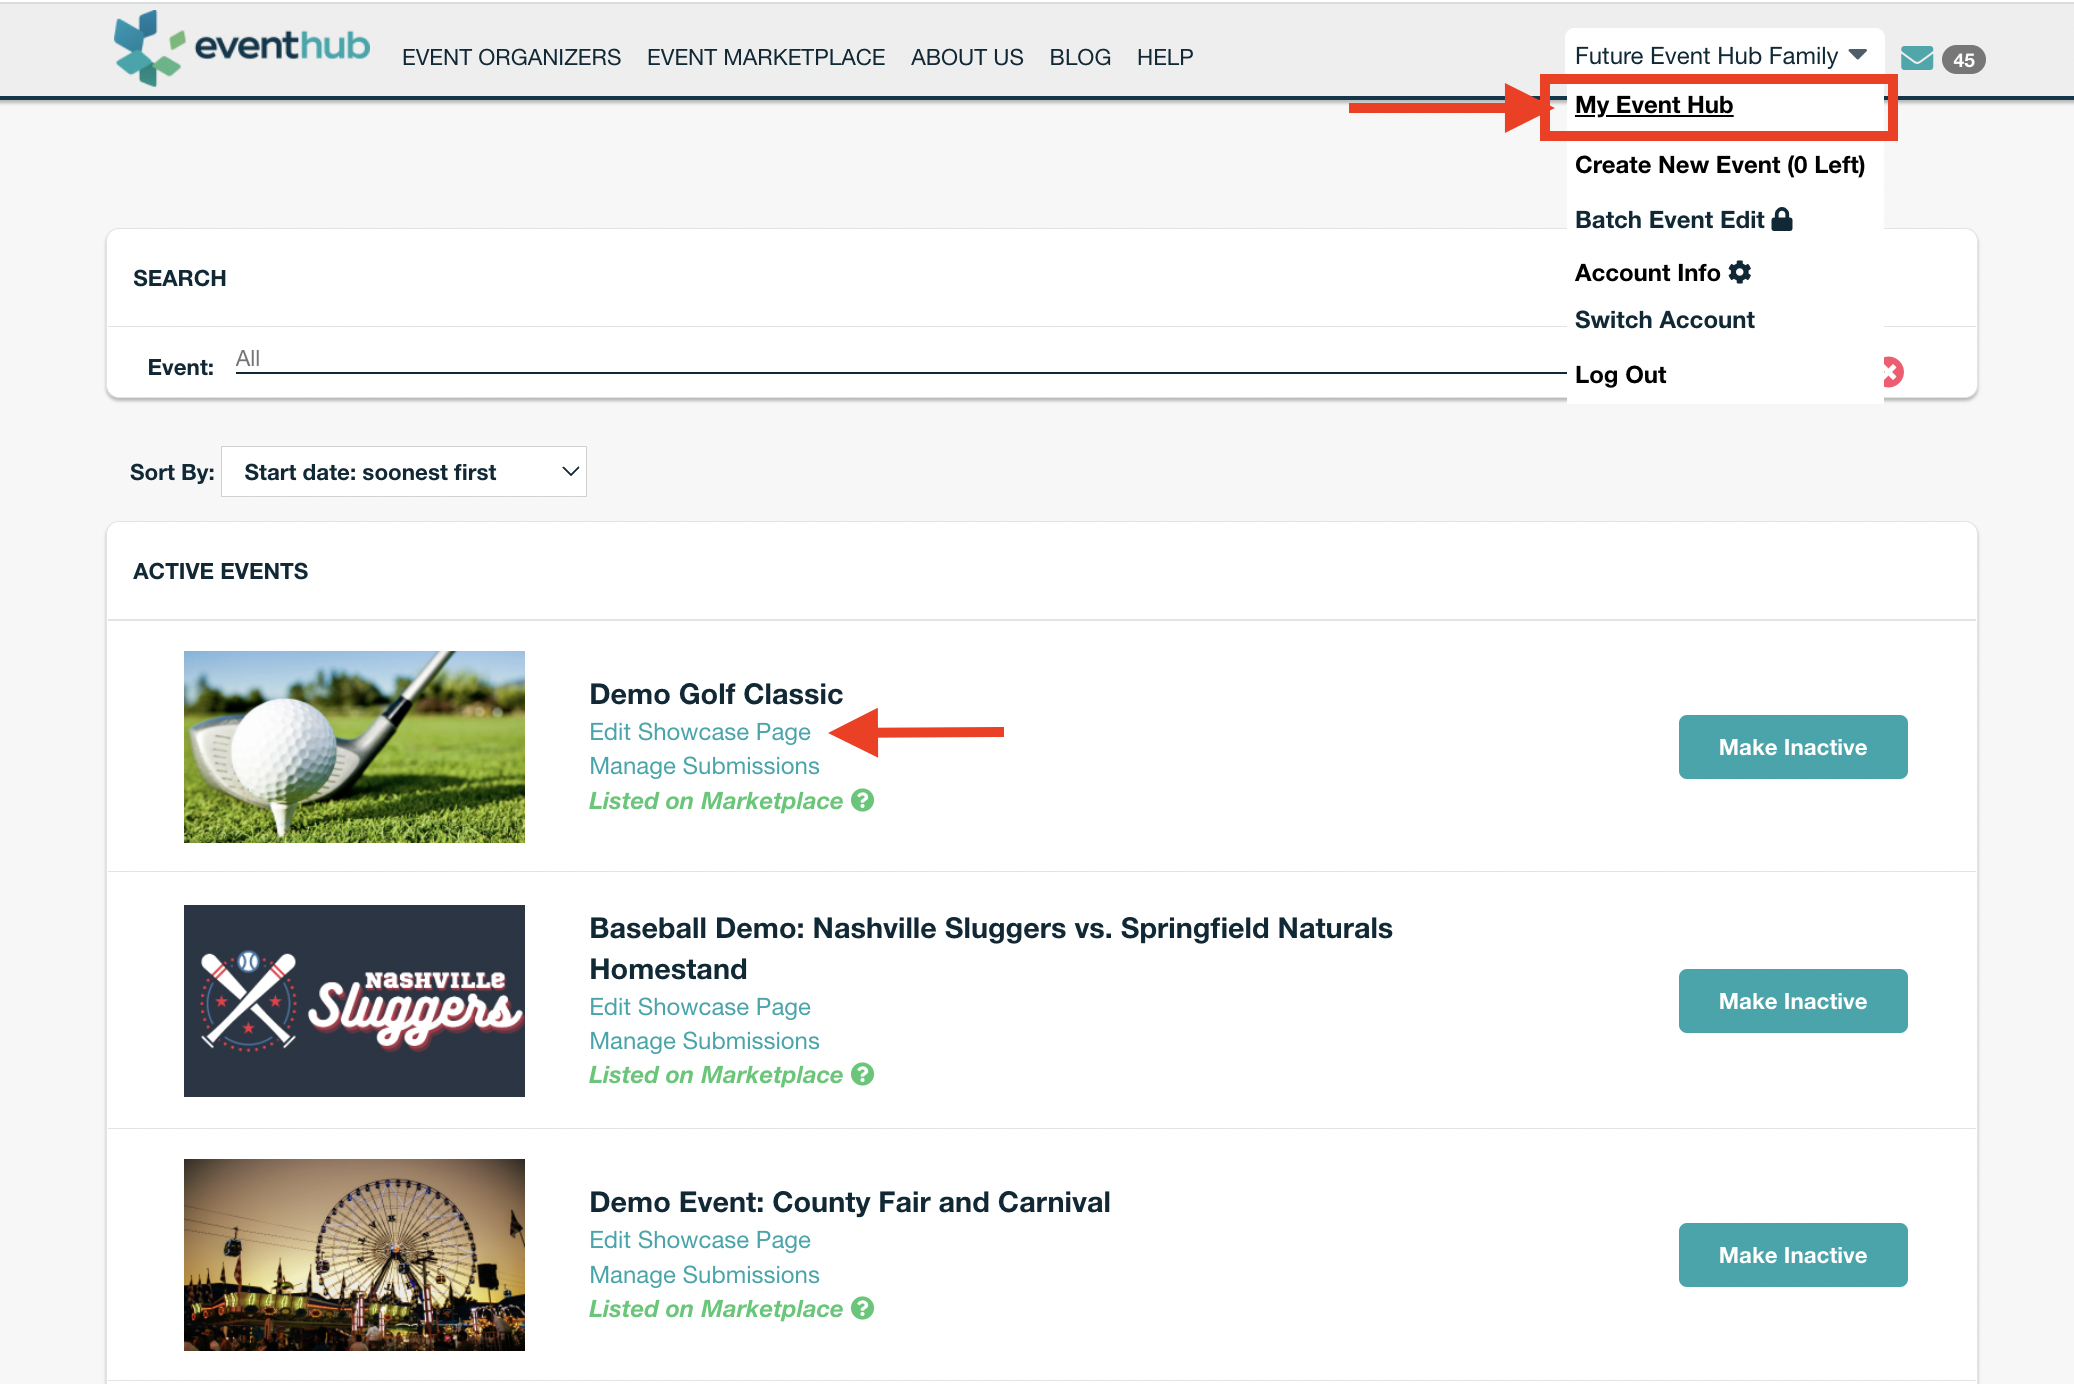
Once your live floor plan has been developed, there are some settings that can be decided and changed on your end. First go to your event wizard by selecting the "Edit Showcase Page link" located on your "My Event Hub" dashboard.
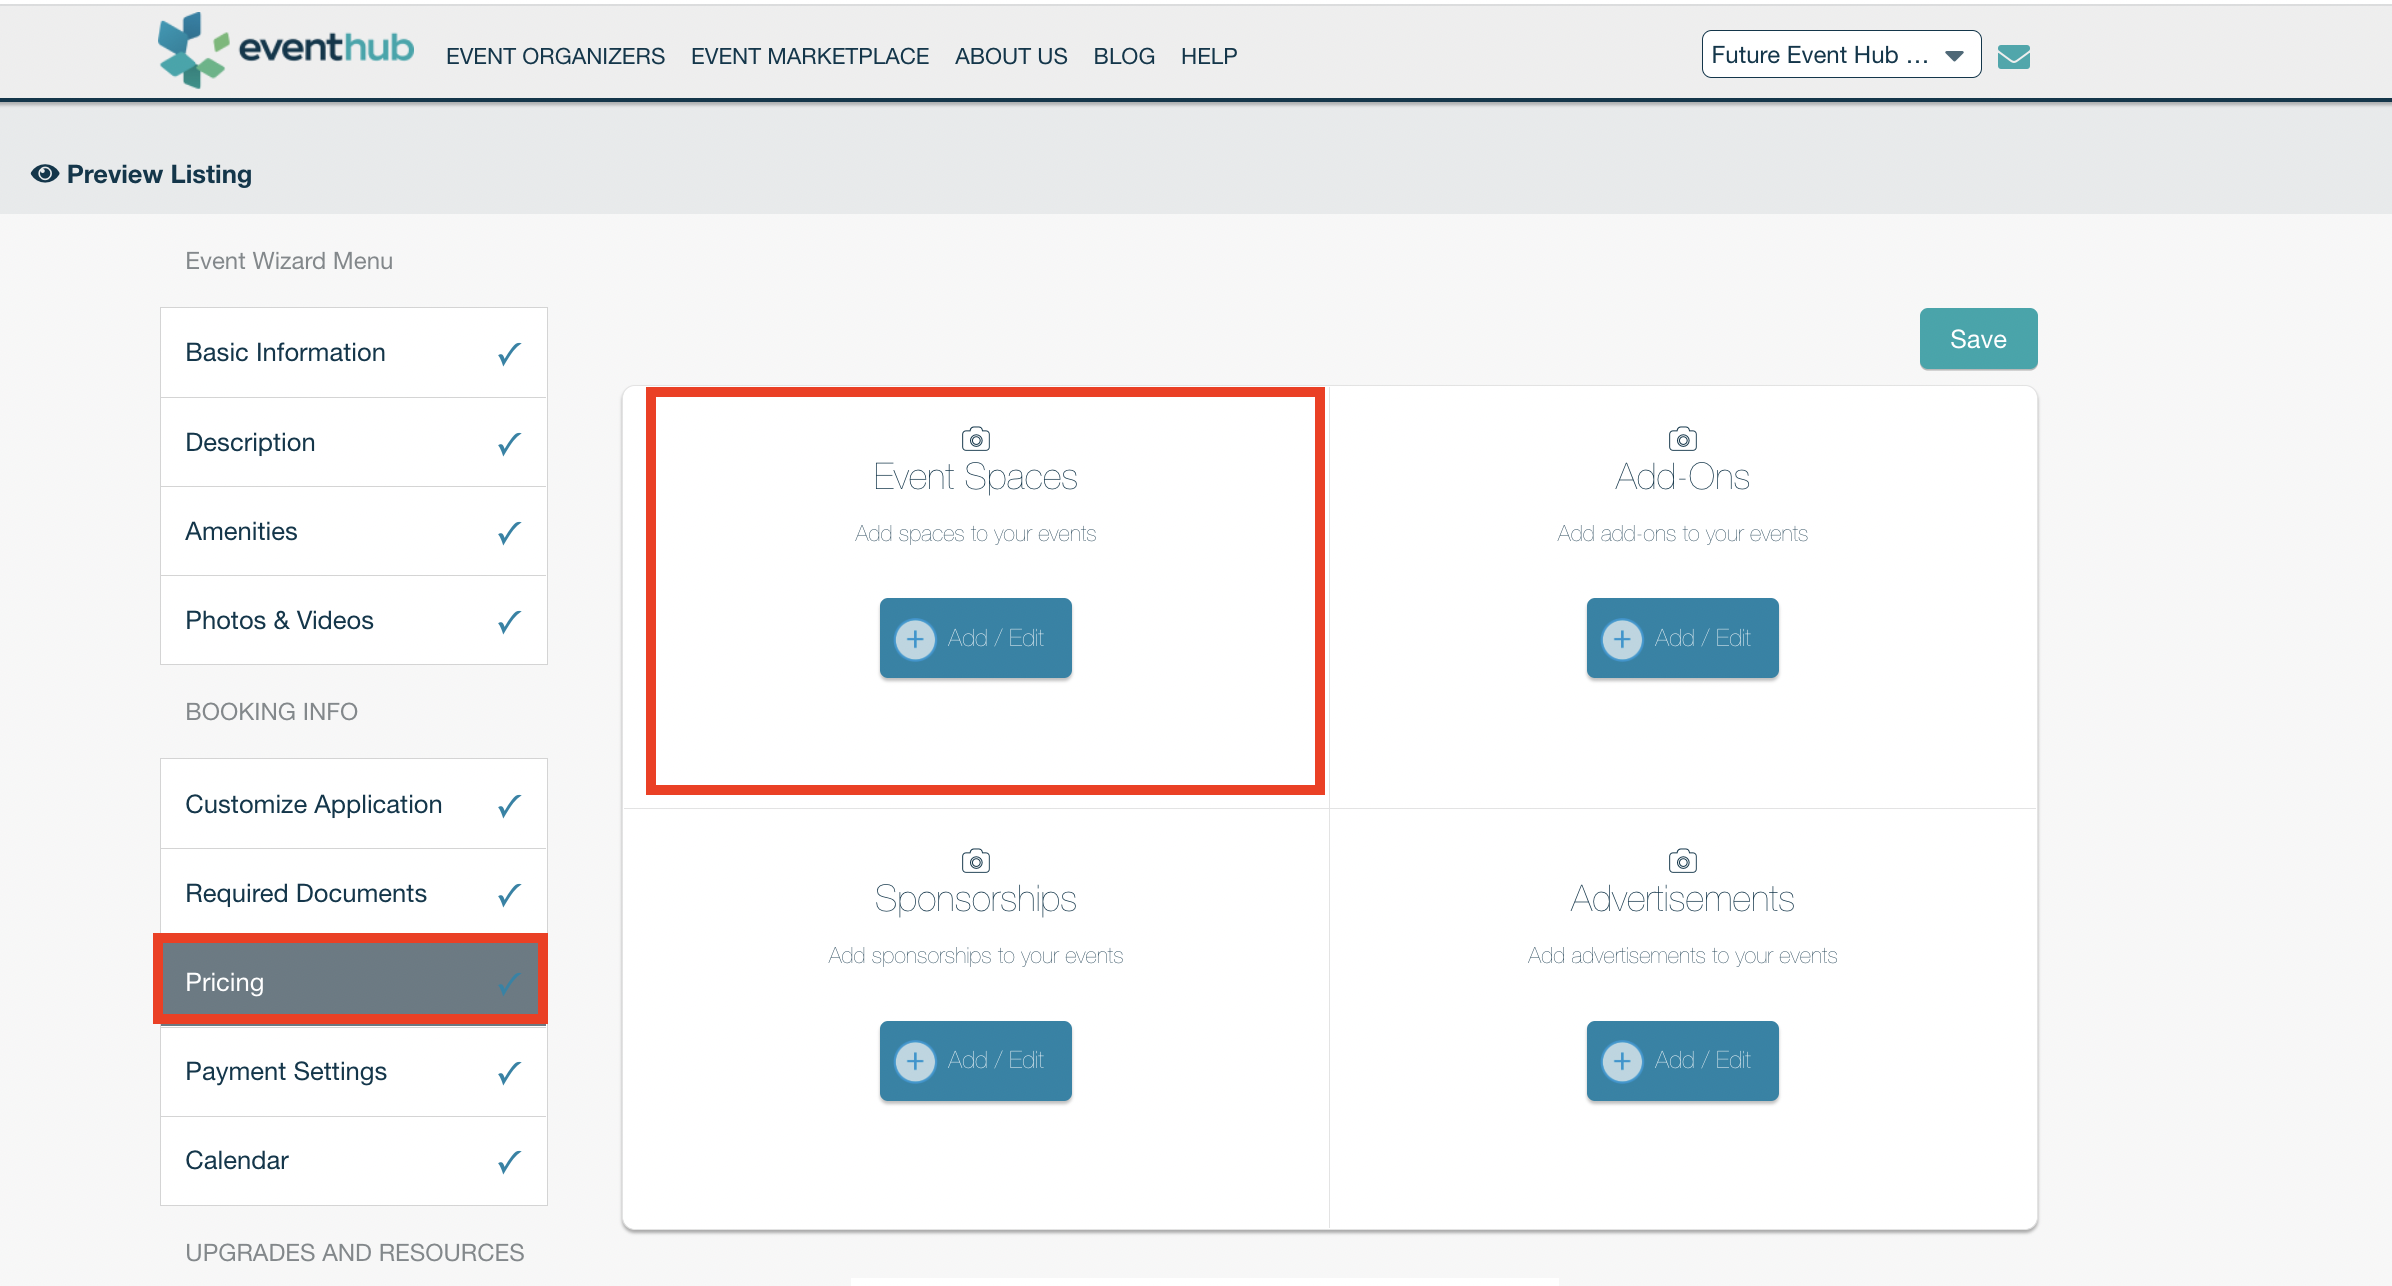
These settings can be found on the "Pricing" tab of your Edit Showcase Page wizard where you added your booth types.
Choose Your Booth Selection Preferences
There are two different settings you can choose from to customize the checkout experience for your exhibitors. The first is to allow them to choose their own booth space. The second option, which is much more popular, is to let your exhibitors give you their top 3 preferred spaces during checkout. You are not bound to this choice at all, but it is a nice way to ask your exhibitors for their input!
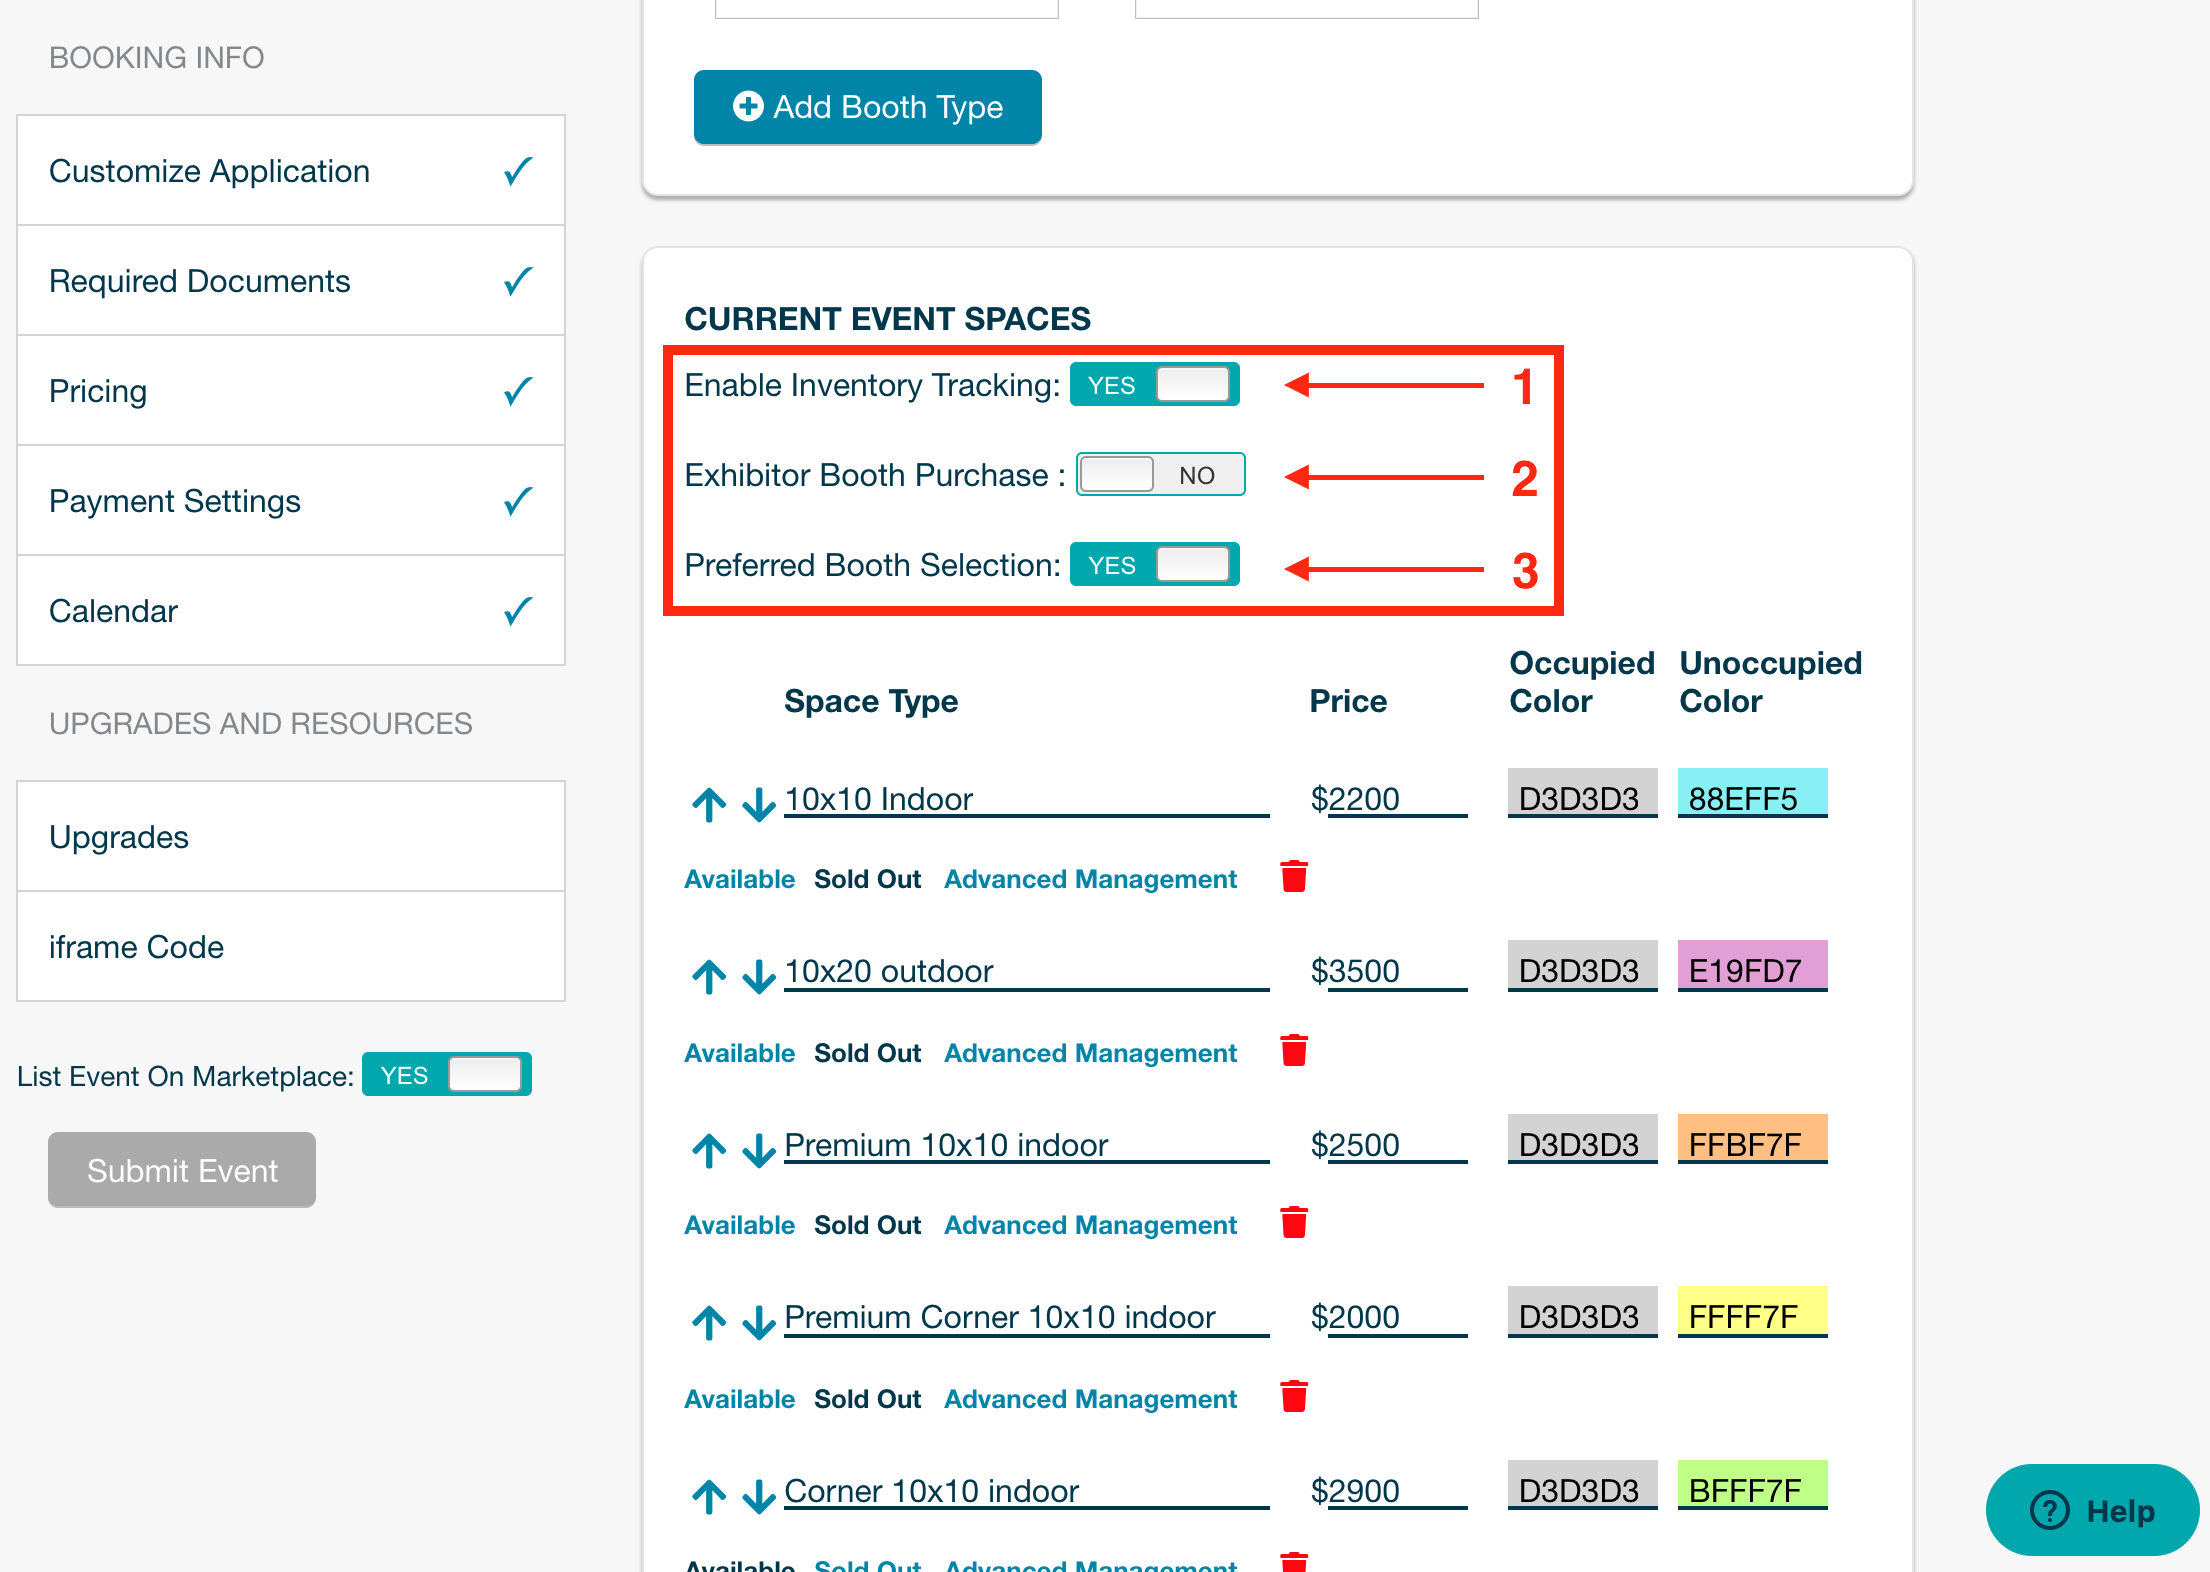
1. Enable Inventory Tracking - Leave this turned on at all times. This allows for communication between your Submissions Dashboard and your Live Floor Plan. Only those without the live floor plan need to choose whether or not to have this turned on!
2. Exhibitor Booth Purchase - Turning this toggle on will let your exhibitors choose their own booth space during checkout. While you can change their assignment if necessary, this option should only be used if you are comfortable with your exhibitors assigning themselves to a space.
3. Preferred Booth Selection - This setting will allow your exhibitors to choose up to 3 booth spaces as a preference during checkout. This is input only, and you will be able to assign them wherever you need them to be. However, it is a great way to gather preferences and invite them to participate a bit more in creating a positive experience!
Change Your Booth Colors
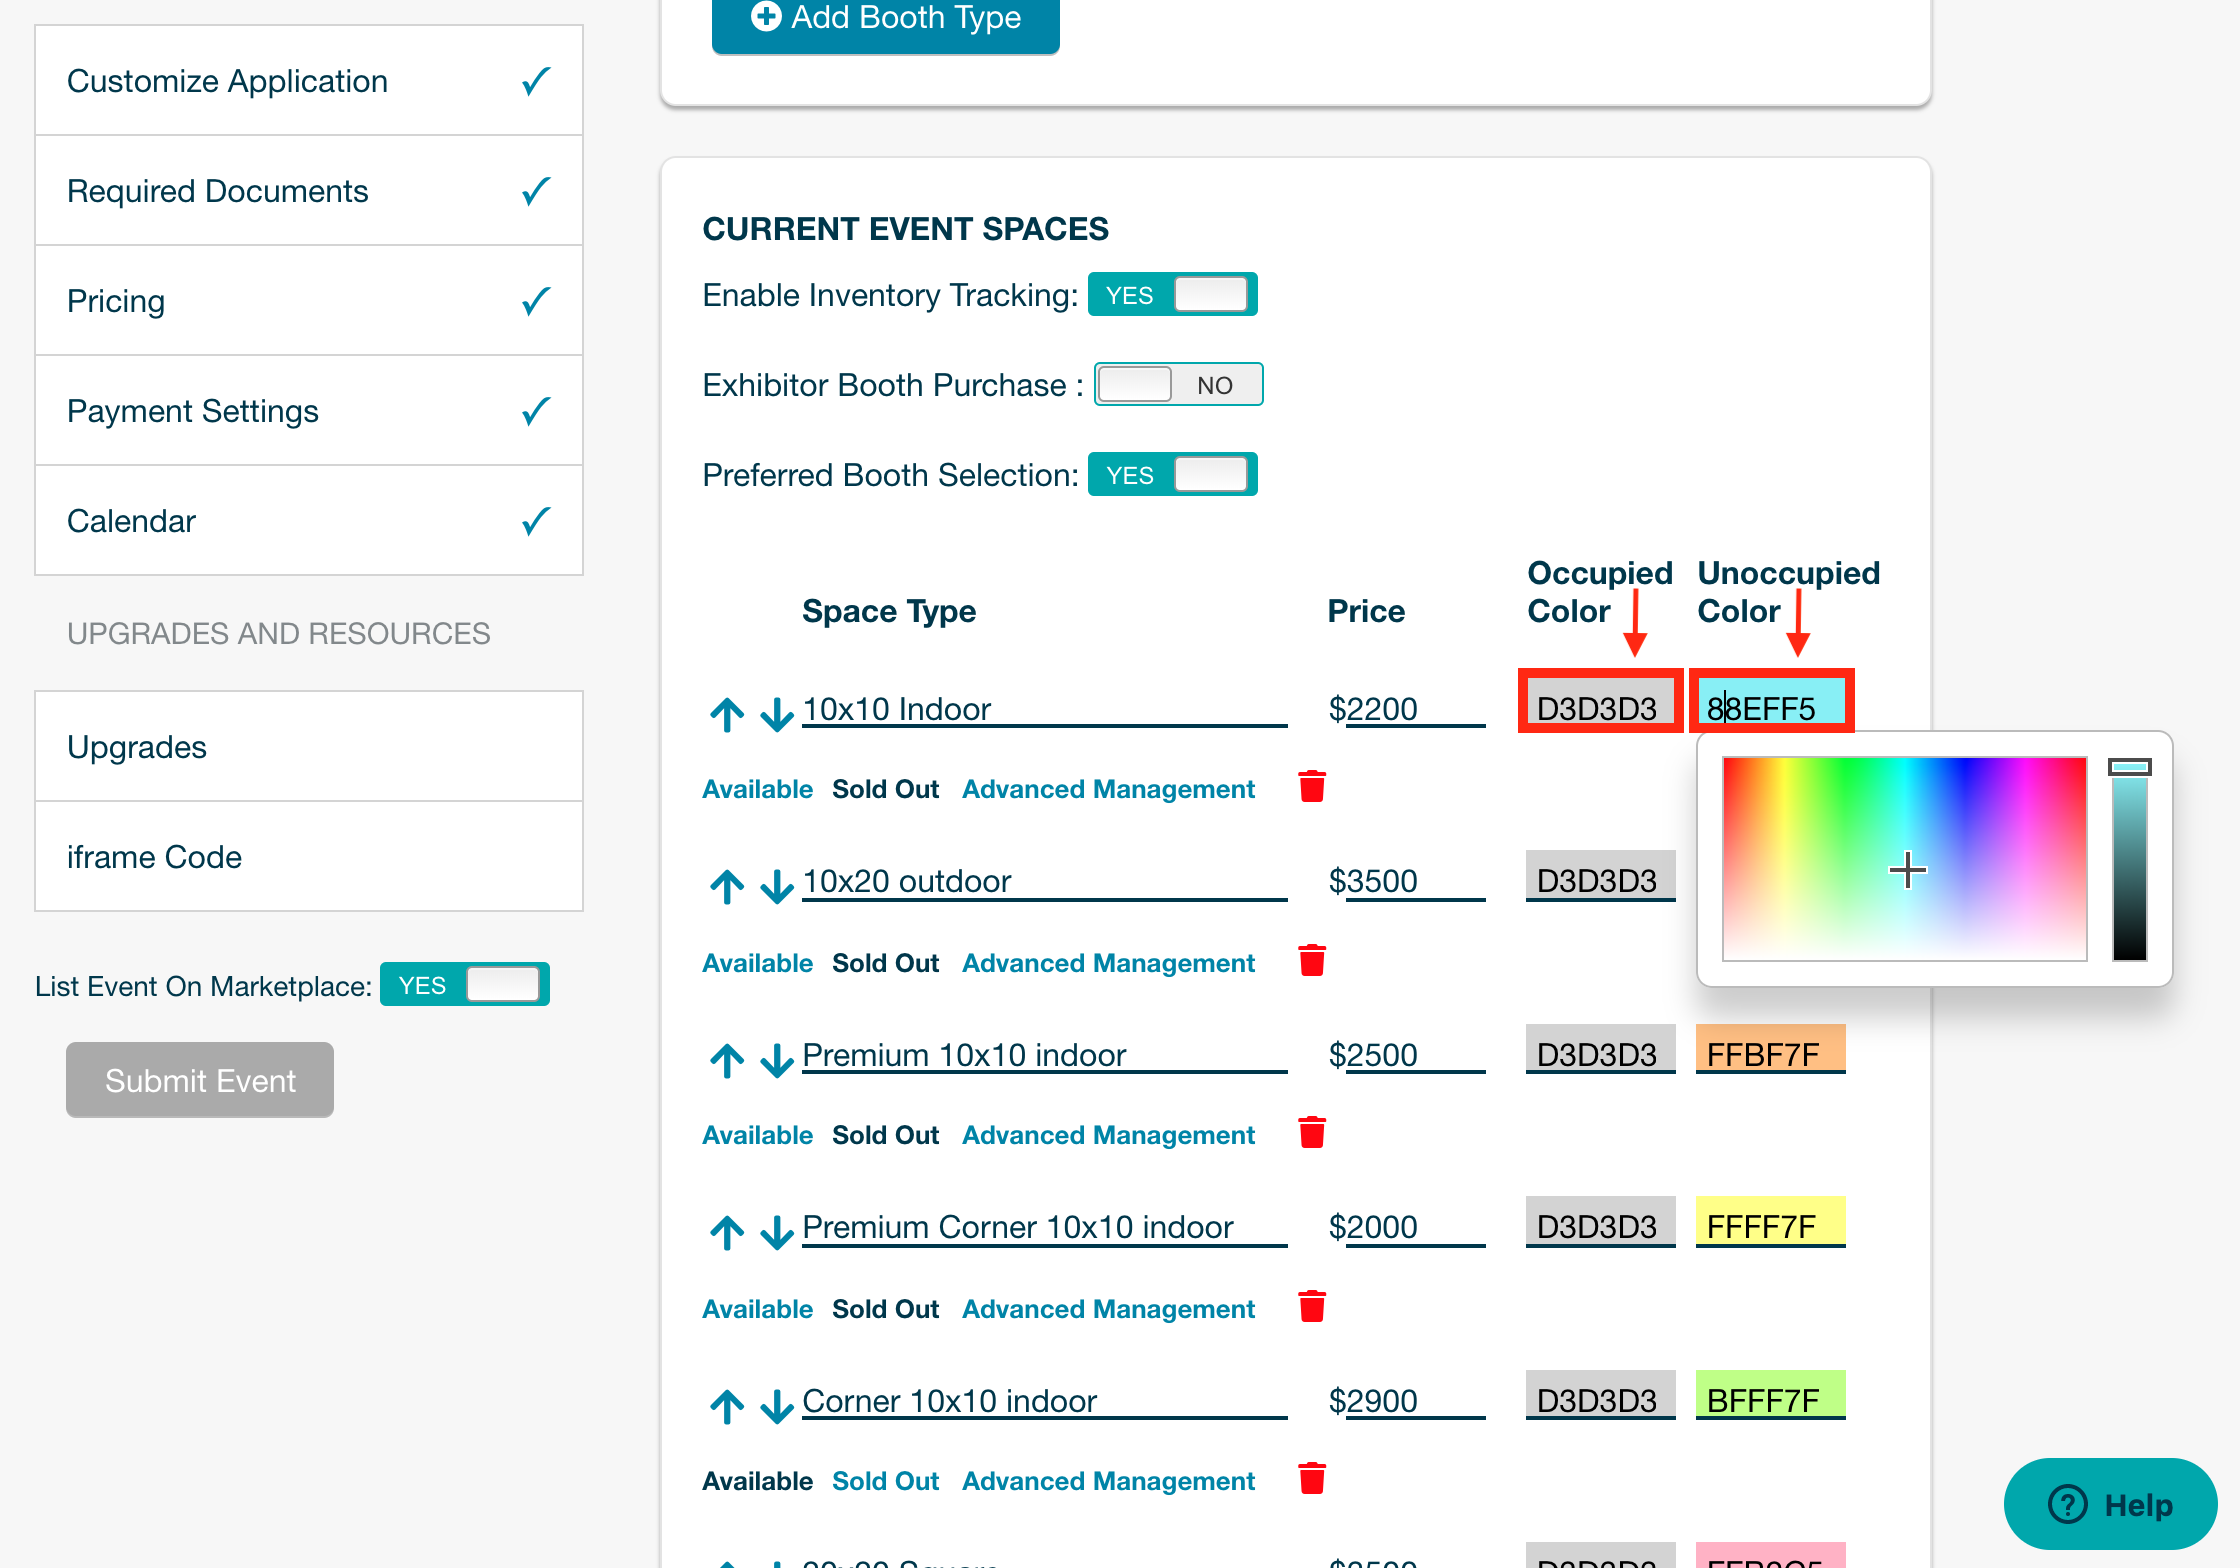
When we sync your map up to your page, we will set some default colors for your booths (likely based on your logo colors), but you are more than welcome to customize this for your event! To update your colors, all you need to do is click on the color code, and choose from the color box that appears. Alternatively, if you have a specific HTML color code you'd like to use, you can input the code.
The Occupied Color is the color that the booth will change too once someone has been assigned to the space. Gray and red are popular choices!
The Unoccupied Color is the color that the booth type will appear when empty.
Now that your booths are set up, you can assign exhibitors and sponsors to the spaces.
Suggested Articles:
Managing your Live Floor Plan & Vendor Booth Assignment
Editing/Adding Info to a Vendor's Public Profile
Comments
0 comments
Please sign in to leave a comment.